ایمیل
ایمیل  چت آنلاین
  پشتیبانی
 آموزش کار با Hotlink Protection در cpanel
دوستان عزیز پیشگام وبی امیدوارم که حالتون خوب باشه ، امروز با آموزش کار با Hotlink Protection در cpanel خدمتتون هستیم و امیدوارم توضیحاتی که در این مطلب و یا در انتها مطلب که بصورت فیلم قرارداده شده بتونه به شما کمک کنه و هر روز بیشتر پیشرفت کنید.
خوب اصلا این قسمت به چه دردی میخوره کجا بهش نیاز داریم و در کل کاربردش چی هست؟
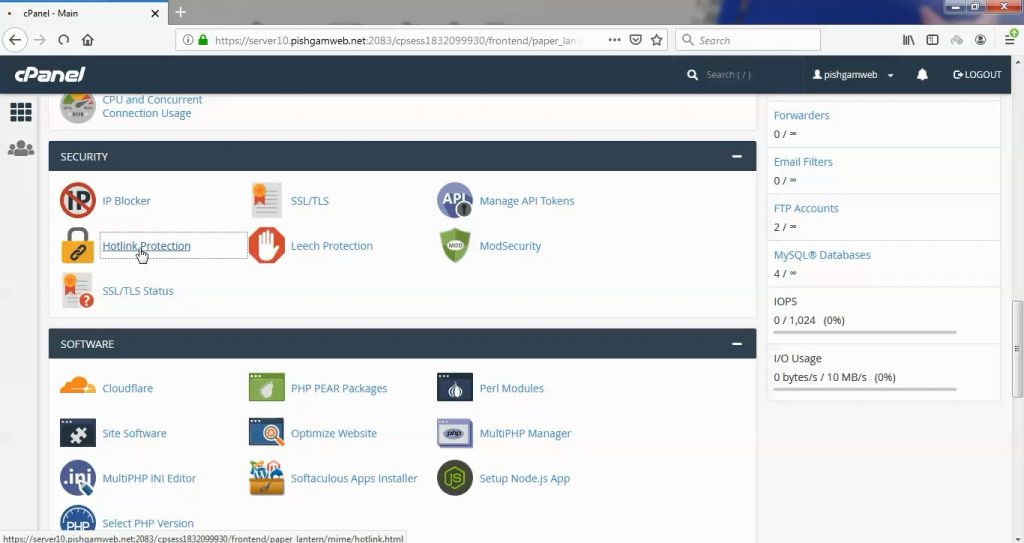
این قسمت برای تغییر پسورد در سی پنل میباشد که با عنوان Hotlink Protection در قسمت Security موجود میباشد.
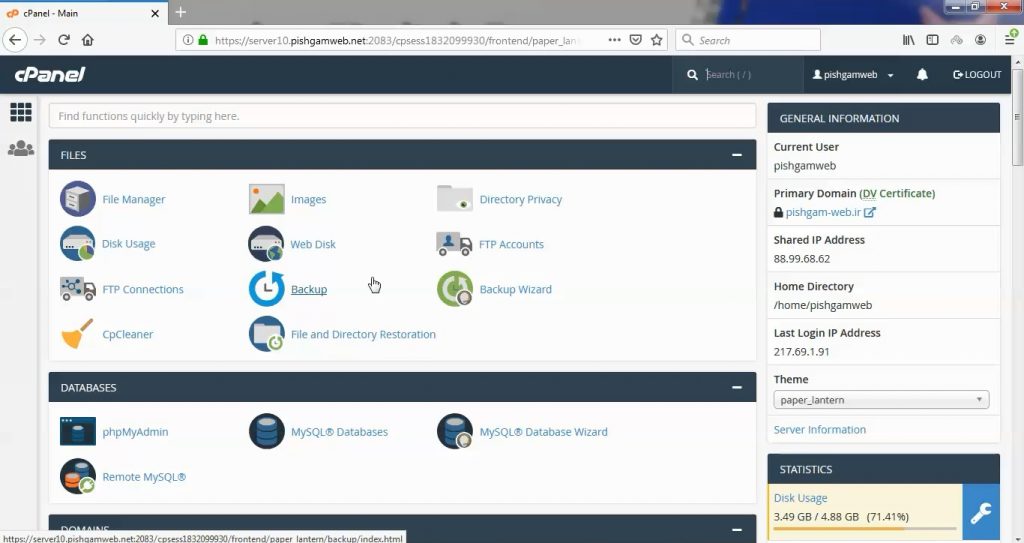
ابتدا وارد هاستمون داخل سایت پیشگام وب میشیم.
میتوانیم از سرویس های من ورود به سی پنل رو میزنید تا بصورت اتوماتیک وارد هاستمون بشیم.
این قسمت برای جلوگیری از کپی برداری از مطالب سایت شما و همچنین استفاده از پهنای باند شما طراحی شده است .
با فعال کردن این قسمت میتوانید مشخص کنید که عکس ، فیلم و… فیط و فیط از سایت شما لود شود.
حالت دیفالت غیر فعال هست
Hotlink protection is currently “disabled”.
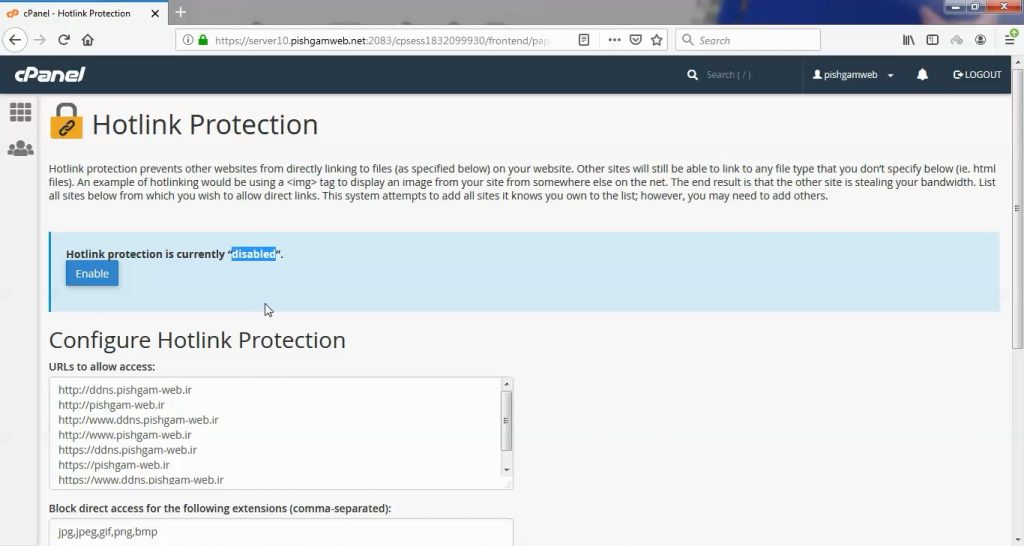
در قسمت URLs to allow access: آدرس هایی که اجازه دسترسی به مطالب مورد نظر را دارد وارد میکنید ، معمولا دیفالت ادرس های خود سایت ما هست.
در قسمت Block direct access for the following extensions (comma-separated): فرمت هایی که قرار هست بر روی آنها محدودیت اعمال شود را مشخص میکنید بطور مثال jpg,jpeg,gif,png,bmp که با , از هم جدا شده اند.
در قسمت Allow direct requests (for example, when you enter the URL of an image in a browser). NOTE: You must select the “Allow direct requests” checkbox when you use hotlink protection for files that you want visitors to view in QuickTime (for example, Mac Users). شما میتوانید مشخص کنید که مثلا عکس مورد نظر بصورت لینک مستقیم باز شود یا خیر که پیشنهاد ما این هست که باز شود فلذا تیک آن را قرار دهید.
در قسمت Redirect the request to the following URL: میتوانید صفحه ای ایجاد کنید تا هر شخصی دسترسی نداشت به آن صفحه ریدایرکت شود.
مشاهده فیلم آموزشی از سایت آپارات
برای دانلود فیلم آموزش از قسمت تنظیمات روی گزینه دانلود کلیک کرده و کیفیت مد نظر خود را انتخاب کنید تا فیلم آموزش دانلود گردد.
نکته : هر چقدر که عدد این قسمت بیشتر باشد ، کیفیت فیلم دانلودی بالاتر خواهد بود.
آموزش های متوسطه :
دوستان عزیز آموزش که خدمتتون ارائه کردیم از سری آموزش های ابتدایی پیشگام وب هست و این آموزش جزو آموزش های متوسطه هست که باعث میشه شما بتونید سایتتون رو بهتر از قبل مدیریت کنید.
این آموزش ها به شما کمک میکنه تا به مرور زمان به یک طراح سایت تبدیل بشید و اون رو به عنوان شغل خودتون انتخاب کنید و اگر هم قصد ندارید به عنوان شغل بهش نگاه کنید میتوانید پشتیبانی سایت خودتان را در دست بگیرید.
learn in cpanel
Overview
A hotlink occurs when someone embeds content from your site in another site and uses your bandwidth to serve the files. You can use this interface to prevent this issue.
- When you disable hotlinks, make certain that you allow hotlinks for any necessary domains. For example, your website’s subdomains and the URL that you use to access your cPanel account.
- The URL for accessing your cPanel account should appear in the List the URLs to which you wish to allow access menu. If it doesn’t, you may not see embedded images in the HTML Editor section of the File Manager interface (cPanel >> Home >> Files >> File Manager).
Enable hotlink protection
To enable hotlink protection, perform the following steps:
-
Click Enable. A new interface will open and display the Allowed referrers and Protected extension lists.
-
Click Go back.
-
To allow specific sites to hotlink to your site, add their URLs in the URLs to allow access menu.
-
To block direct access to files of specific types, add those file extensions to the Block direct access for the following extensions text box.
- For example, to block all
.jpgimages, add.jpgto the Block direct access for the following extensions text box. - When you block these file types, others cannot hotlink to those types of files from your website regardless of any other settings.
- For example, to block all
-
To allow visitors access to specific content through the URL, select the Allow direct requests checkbox. For example, if you enable this setting, a visitor could enter
http://www.example.com/folder/example.jpgas a URL to access theexample.jpgfile. -
To redirect requests for certain content, enter the URL to which you want to redirect your visitor in the Redirect the request to the following URL text box.
-
Click Submit.
Disable hotlink protection
To disable hotlink protection, click Disable.
When you click Disable, the system deletes the entries in the List the URLs to which you wish to allow access list. We strongly recommend that you save the list locally before you disable hotlink protection.