ایمیل
ایمیل  چت آنلاین
  پشتیبانی
 آموزش کار با Optimize Website در cpanel

دوستان عزیز پیشگام وبی امیدوارم که حالتون خوب باشه ، امروز با آموزش کار با Optimize Website در cpanel خدمتتون هستیم و امیدوارم توضیحاتی که در این مطلب و یا در انتها مطلب که بصورت فیلم قرارداده شده بتونه به شما کمک کنه و هر روز بیشتر پیشرفت کنید.
خوب اصلا این قسمت به چه دردی میخوره کجا بهش نیاز داریم و در کل کاربردش چی هست؟
این قسمت برای تغییر پسورد در سی پنل میباشد که با عنوان Optimize Website در قسمت Software موجود میباشد.
ابتدا وارد هاستمون داخل سایت پیشگام وب میشیم.
میتوانیم از سرویس های من ورود به سی پنل رو میزنید تا بصورت اتوماتیک وارد هاستمون بشیم.

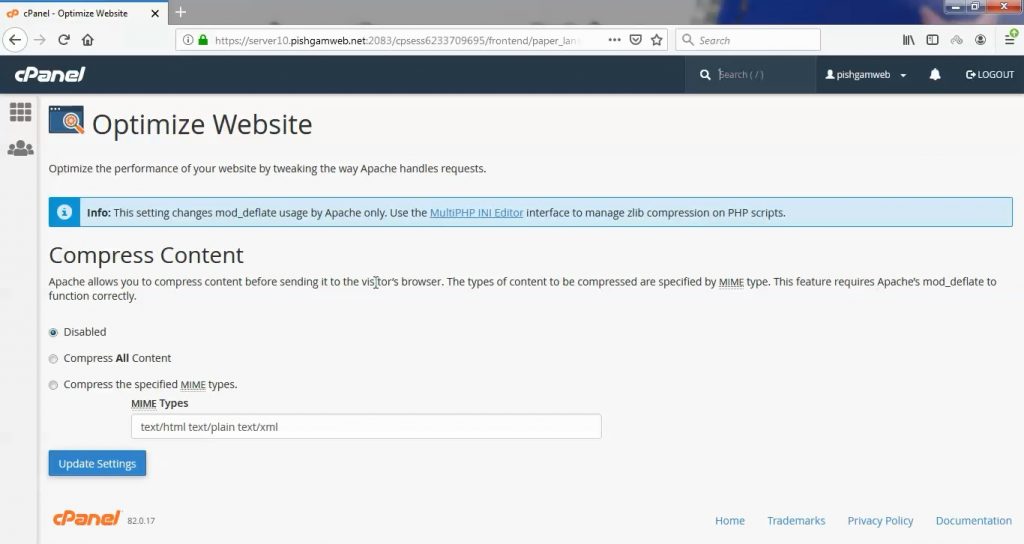
Optimize Website یکی از بهترین ابزارهای سی پنل برای افزایش راندمان و سرعت سایت شما است. Optimize Website از طریق افزودن کد های فشرده سازی که مربوط به mod_deflate در آپاچی است سرعت سایت شما افزایش یابد.
البته لازمه این کار این است که mod_deflate قبلا توسط مدیر سرور روی هاست شما فعال شده باشد.
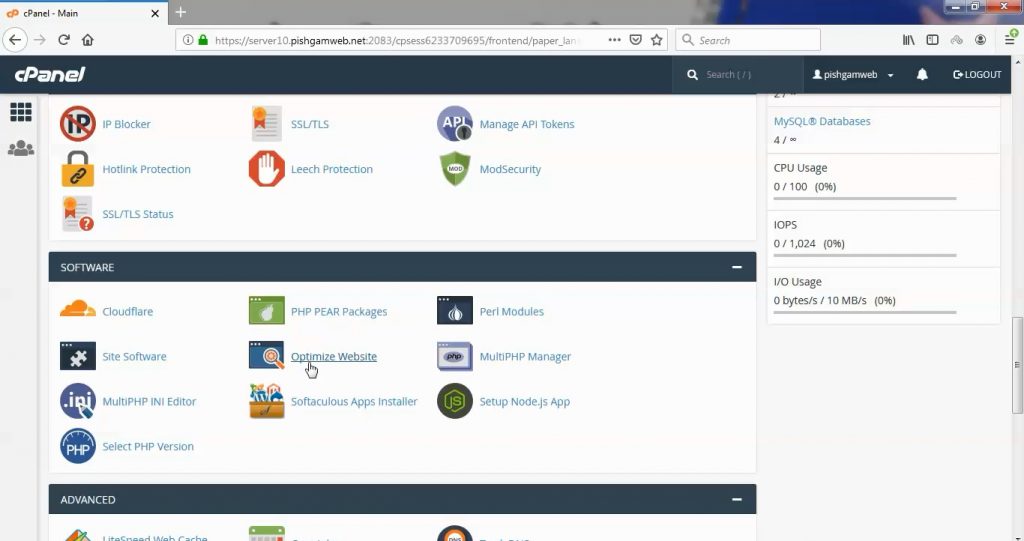
ابتدا از قسمت Software روی گزینه Optimize Website کلیک میکنیم.
Disabled:
در صورتی که این گزینه انتخاب شود Optimize Website غیرفعال خواهد بود و معمولا حالت دیفالت در سرور بدین صورت میباشد.
Compress All Content:
با انتخاب این گزینه همه محتوای سایت شما فشرده خواهند شد.
Compress the specified MIME types:
با انتخاب این گزینه می توانید در بخش زیر آن نوع محتوایی که تمایل دارید فشرده شود را می توانید مشخص نمایید. برای مثال خود سی پنل text/html text/plain text/xml را به عنوان نمونه قرار داده است و هر یک را بخواهید میتوانید پاک کرده و یا موردی اضافه کنید برای جداسازی از یکدیگر هم از / استفاده کنید.
در زیر نمونه کدی که در فایل htaccess ایجاد میشود قرار داده شده.
<IfModule mod_deflate.c>
    SetOutputFilter DEFLATE
    <IfModule mod_setenvif.c>
        # Netscape 4.x has some problems...
        BrowserMatch ^Mozilla/4 gzip-only-text/html

        # Netscape 4.06-4.08 have some more problems
        BrowserMatch ^Mozilla/4\.0[678] no-gzip

        # MSIE masquerades as Netscape, but it is fine
        # BrowserMatch \bMSIE !no-gzip !gzip-only-text/html

        # NOTE: Due to a bug in mod_setenvif up to Apache 2.0.48
        # the above regex won't work. You can use the following
        # workaround to get the desired effect:
        BrowserMatch \bMSI[E] !no-gzip !gzip-only-text/html

        # Don't compress images
        SetEnvIfNoCase Request_URI .(?:gif|jpe?g|png)$ no-gzip dont-vary
    </IfModule>

    <IfModule mod_headers.c>
        # Make sure proxies don't deliver the wrong content
        Header append Vary User-Agent env=!dont-vary
    </IfModule>
</IfModule>
مشاهده فیلم از سایت آپارات
برای دانلود فیلم آموزش از قسمت تنظیمات روی گزینه دانلود کلیک کرده و کیفیت مد نظر خود را انتخاب کنید تا فیلم آموزش دانلود گردد.
نکته : هر چقدر که عدد این قسمت بیشتر باشد ، کیفیت فیلم دانلودی بالاتر خواهد بود.
آموزش های متوسطه :
دوستان عزیز آموزش که خدمتتون ارائه کردیم از سری آموزش های ابتدایی پیشگام وب هست و این آموزش جزو آموزش های متوسطه هست که باعث میشه شما بتونید سایتتون رو بهتر از قبل مدیریت کنید.
این آموزش ها به شما کمک میکنه تا به مرور زمان به یک طراح سایت تبدیل بشید و اون رو به عنوان شغل خودتون انتخاب کنید و اگر هم قصد ندارید به عنوان شغل بهش نگاه کنید میتوانید پشتیبانی سایت خودتان را در دست بگیرید.
learn in cpanel
Overview
This interface allows you to configure your server to automatically compress specified types of content when visitors access that content.
Your system administrator must enable the mod_deflate Apache module for this interface to appear in cPanel.
Manage compression
To disable compression of your website’s content, perform the following steps:
- Select Disabled.
- Click Update Settings.
To compress all of your website’s content, perform the following steps:
- Select Compress All Content.
- Click Update Settings.
To specify a list of types of content to compress, perform the following steps:
- Select the Compress the specified MIME types option.
-
In the MIME Types text box, enter a space-separated list of the types of content that you wish to compress (for example,
text/html text/plain text/xml).Note:- Image file formats (for example,
.jpgand.png) already compress data. Do not include any image file formats in the list. - Apache will compress PHP content if you enable the
zlib.output_compressionsetting in cPanel’s MultiPHP INI Editor interface (cPanel >> Home >> Software >> MultiPHP INI Editor). - For more information, view Wikipedia’s list of internet media types.
- Image file formats (for example,
-
Click Update Settings.
cPanel saves your settings to a .htaccess file in your home directory. Your system administrator customizes these settings with the Apache FileMatch directive.
Additional information
For more information about the mod_deflate module, which handles website content compression, read the documentation for your server’s version of Apache:
The Stats sidebar in cPanel’s Home interface displays your server’s version of Apache.
- Apache 2.0 web server documentation for mod_deflate.
- Apache 2.2 web server documentation for mod_deflate.
- Apache 2.4 web server documentation for mod_deflate.