 ایمیل
ایمیل  چت آنلاین
  پشتیبانی
 آموزش کار با FTP Accounts در cpanel

دوستان عزیز پیشگام وبی امیدوارم که حالتون خوب باشه ، امروز با آموزش کار با FTP Accounts در cpanel خدمتتون هستیم و امیدوارم توضیحاتی که در این مطلب و یا در انتها مطلب که بصورت فیلم قرارداده شده بتونه به شما کمک کنه و هر روز بیشتر پیشرفت کنید.
خوب اصلا این قسمت به چه دردی میخوره کجا بهش نیاز داریم و در کل کاربردش چی هست؟
این قسمت یکی از مهمترین بخش های سی پنل هست که ارور های مهم سایت شما در آن قابل مشاهده میباشد لذا هر هفته یا حداقل هر ماه یکبار باید به این قسمت وارد شده و ارور های داخل آن را بررسی و رفع کنید.
در این قسمت معمولا 300 عدد از آخرین ارور های مهم برای شما نمایش داده میشود و جدید ترین ارور ها در بالاترین خط وجود دارد و از سمت چپ به ترتیب تاریخ و ساعت و سپس آی پی شخص بازدید کننده ارور و پس از آن ادرس فایل ارور را مشخص مینماید.
این قسمت برای تغییر پسورد در سی پنل میباشد که با عنوان FTP Accounts در قسمت files موجود میباشد.
ابتدا وارد هاستمون داخل سایت پیشگام وب میشویم.
میتوانید از سایت پیشگام وب قسمت سرویس های من ، سرویس مورد نظر را انتخاب کرده و ورود به سی پنل را بزنید تا بصورت اتوماتیک وارد هاستتون بشید و همچنین میتوانید از لینک سایت خودتون ، البته اگر که دی ان اس های ( DNS ) پیشگام وب را درست ست کرده باشید و 24 ساعت گذشته باشد از طریق پورت 2082 و یا 2083 وارد بشید.
فقط نکته ای که هست و باید بهش توجه کنید ، اگر سایت را با http باز میکنید از پورت 2082 و اگر با https باز میکنید از 2083 استفاده کنید ، نمونه لینک در زیر مشخص شده است.
البته به این نکته توجه داشته باشید که باید جای آدرس سایت ما آدرس سایت خودتان را وارد کنید.
راه آخر جهت لاگین هم در صورتی که دی ان اس ها ( DNS ) را ست نکرده اید یا 24 ساعت از تنظیم آنها نگذشته است و دوست ندارید بطور مثال اطلاعات ناحیه کاربری رو به طراح بدید استفاده از لینک پیشفرض پیشگام وب هست که در زمان خرید هاست برای شما ارسال شده و اگر هم نتونستید پیدا کنید میتوانید تیکت بدهید تا به شما داده شود ، پایین هم میتوانید نمونه لینک رو مشاهده کنید.
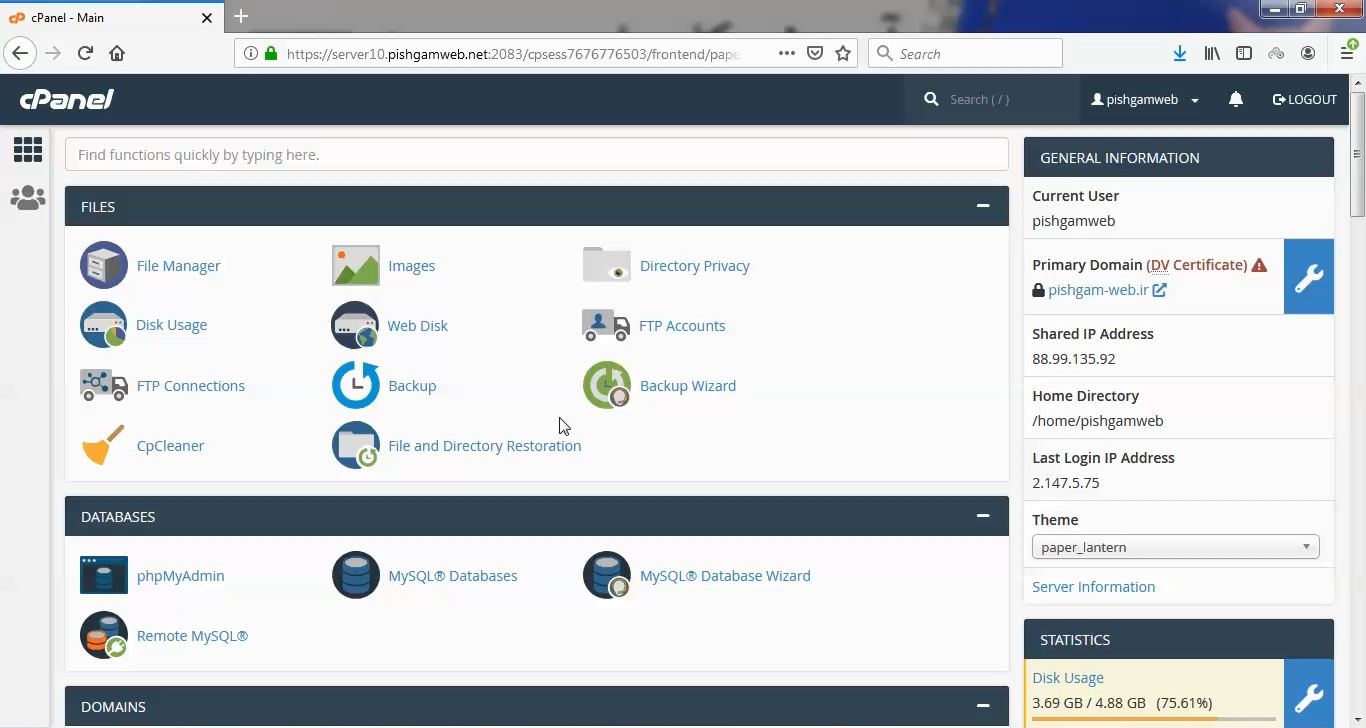
از قسمت فایلز روی گزینه اف تی پی اکانت کلیک کنید.
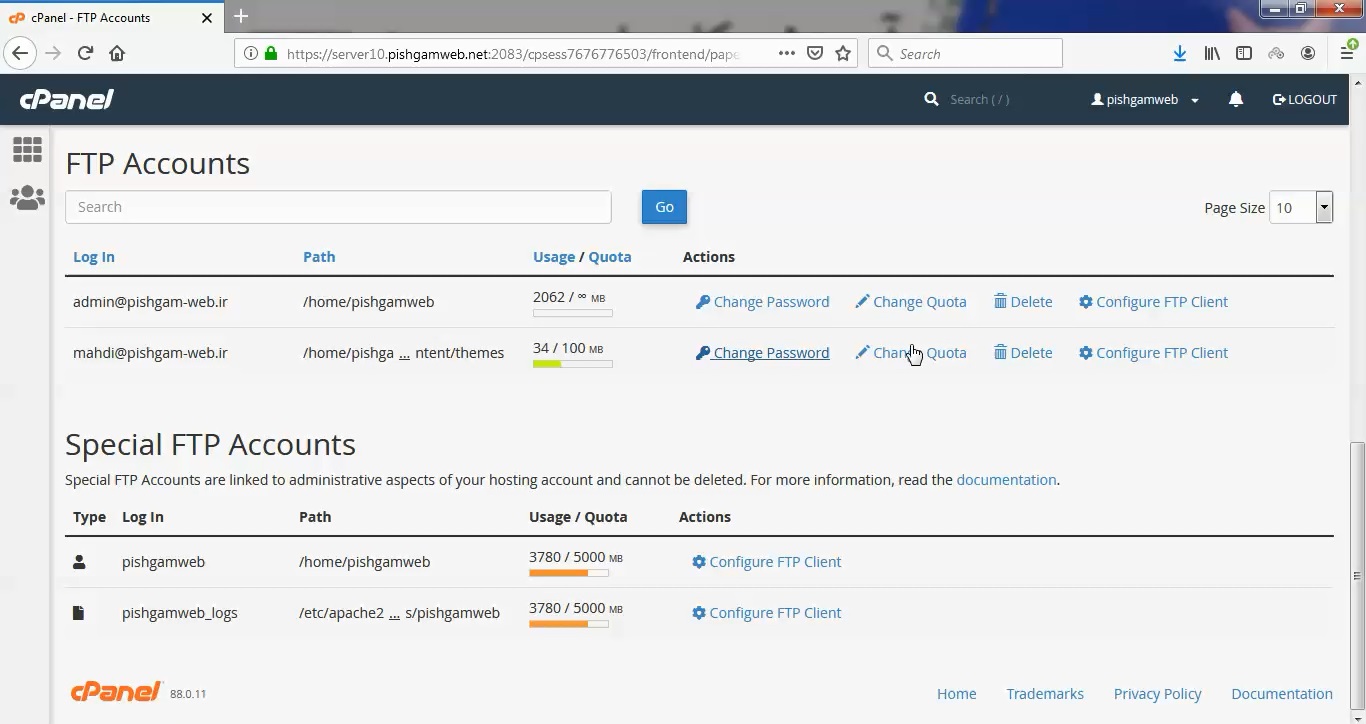
اکانت هایی که قبلا ایجاد شده را در این قسمت میتوانید مشاهده کنید.
برای ایجاد حساب FTP در سی پنل ابتدا گزینه FTP Accounts در سی پنل را کلیک نمایید. در صفحه جدید زیر گزینه Add FTP Accounts موارد زیر را تکمیل نمایید :
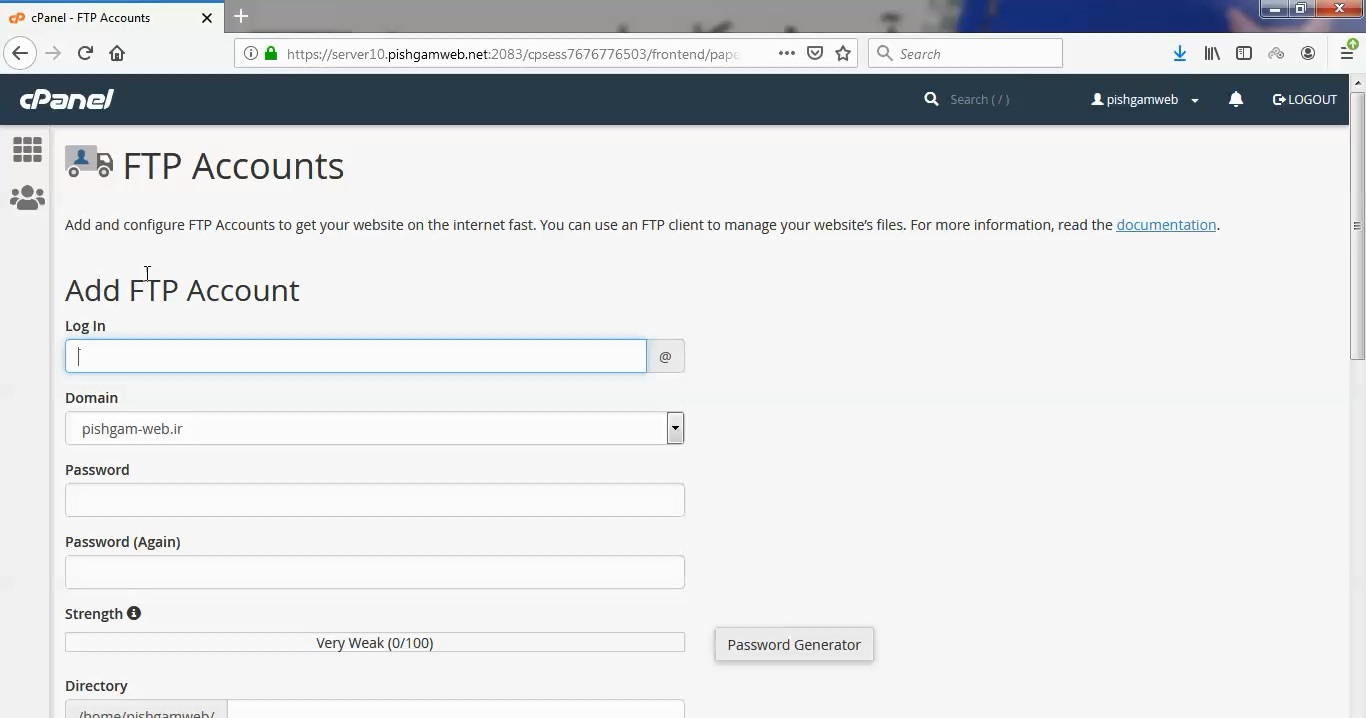
1 – زیر گزینه Login یک به اصطلاح یوزر نیم به اختیار خود وارد نمایید. دقت کنید که این گزینه فقط حروف باشد.
2 – در خط بعد آدرس دامنه مروبطه را انتخاب نمایید که در تصویر فوق ادرس پیشگام وب میباشد.
3 – در خط بعد و زیر گزینه Password رمز عبور را وارد نمایید. دقت کنید که رمز عبور باید ترکیب حروف کوچک و بزرگ، عدد و علامت هایی مثل $ یا % باشد. می توانید از گزینه Password Generator هم برای ایجاد رمز حرفه ای استفاده نمایید.
4 – در خط بعد هم دوباره رمز را مانند بالا وارد کنید.
5 – در خط بعد هم می توانید پوشه ای که کاربر قرار است به آن دسترسی داشته باشد را انتخاب نمایید. دقت کنید هر پوشه ای که انتخاب کنید کاربر به زیر پوشه های آن هم دسترسی خواهد داشت.
6 – گزینه Quota هم میزان فضایی که کار بر به آن دسترسی خواهد داشت را مشخص میکند که می توانید مقداری مشخص را تعریف نمایید یا گزینه Unlimited یعنی بدون محدودیت را انتخاب کنید تا به هر میزانی که هاست فضا دارد را استفاده نماید.
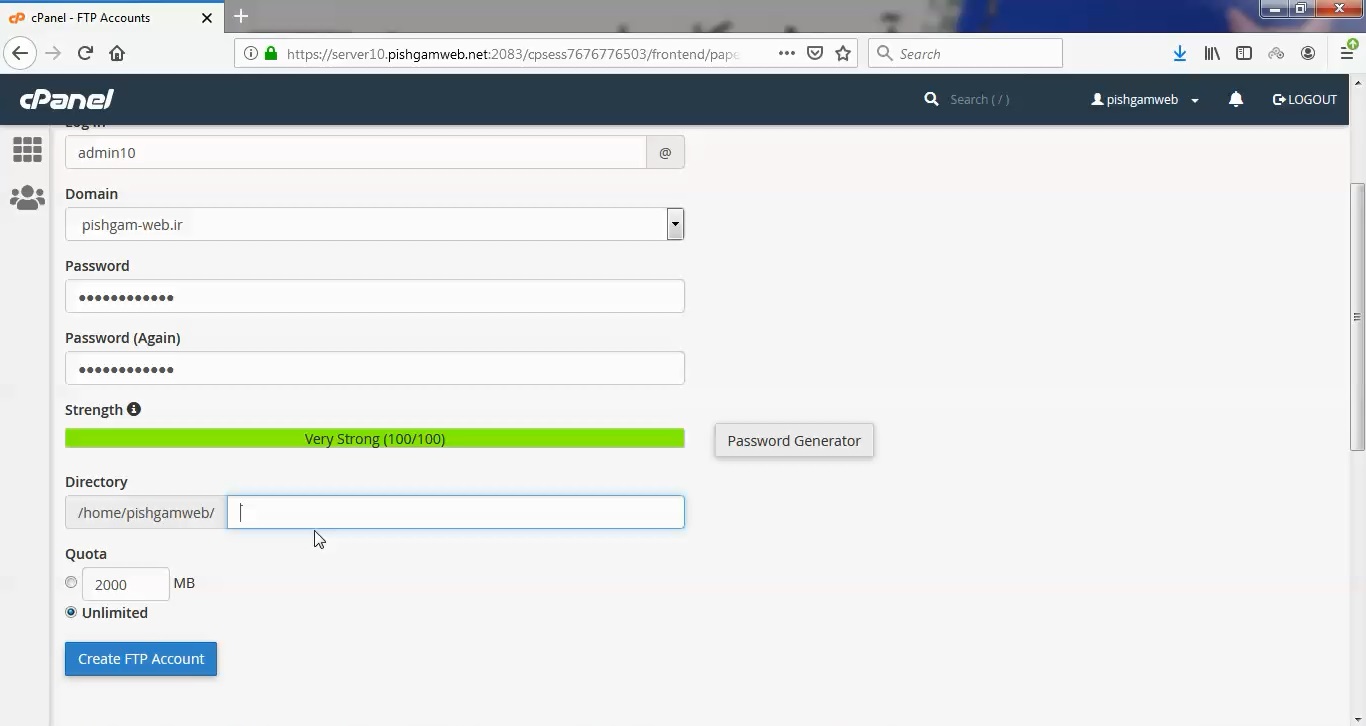
در انتها روی گزینه create ftp account کلیک کنید تا اکانت مورد نظر ایجاد گردد.
همانطور که در تصویر زیر مشخص میباشد یوزر مورد نظر ایجاد شد.

با کلیک روی گزینه Configure FTP Client اطلاعات مربوط به اتصال اف تی پی را مشاهده میکنید.
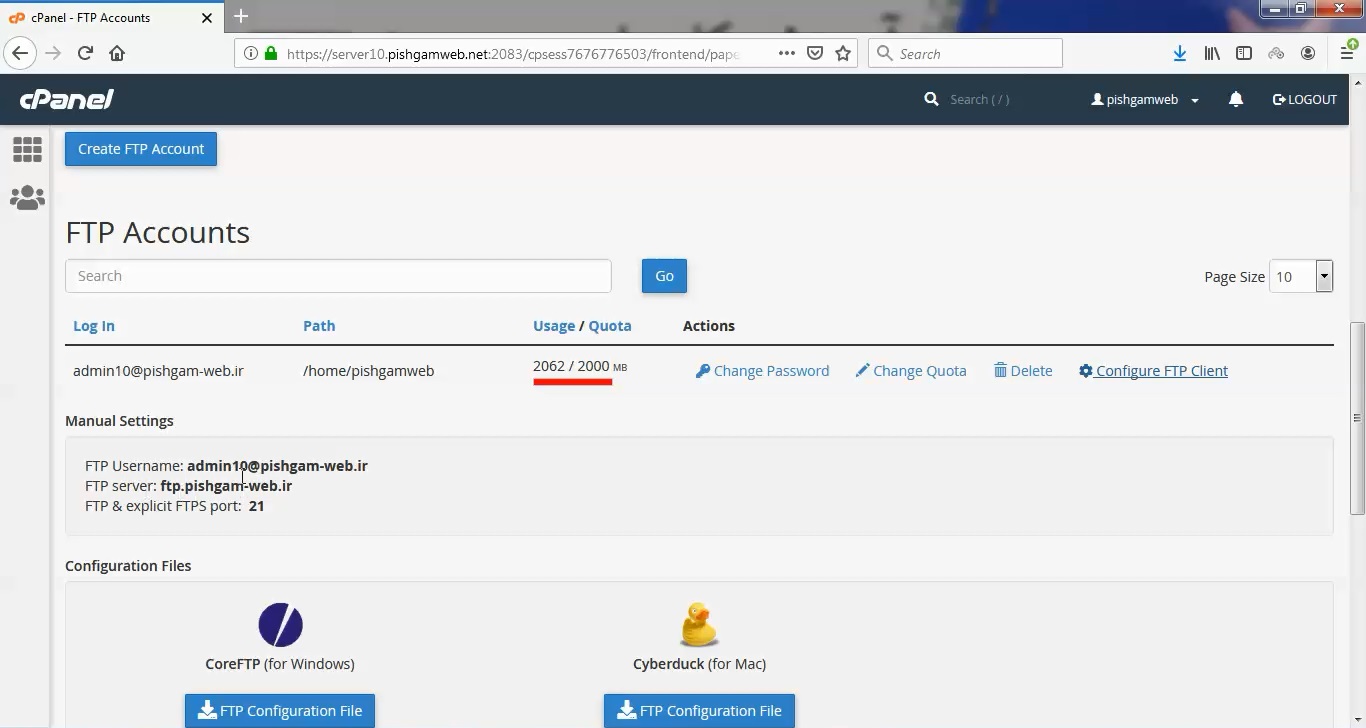
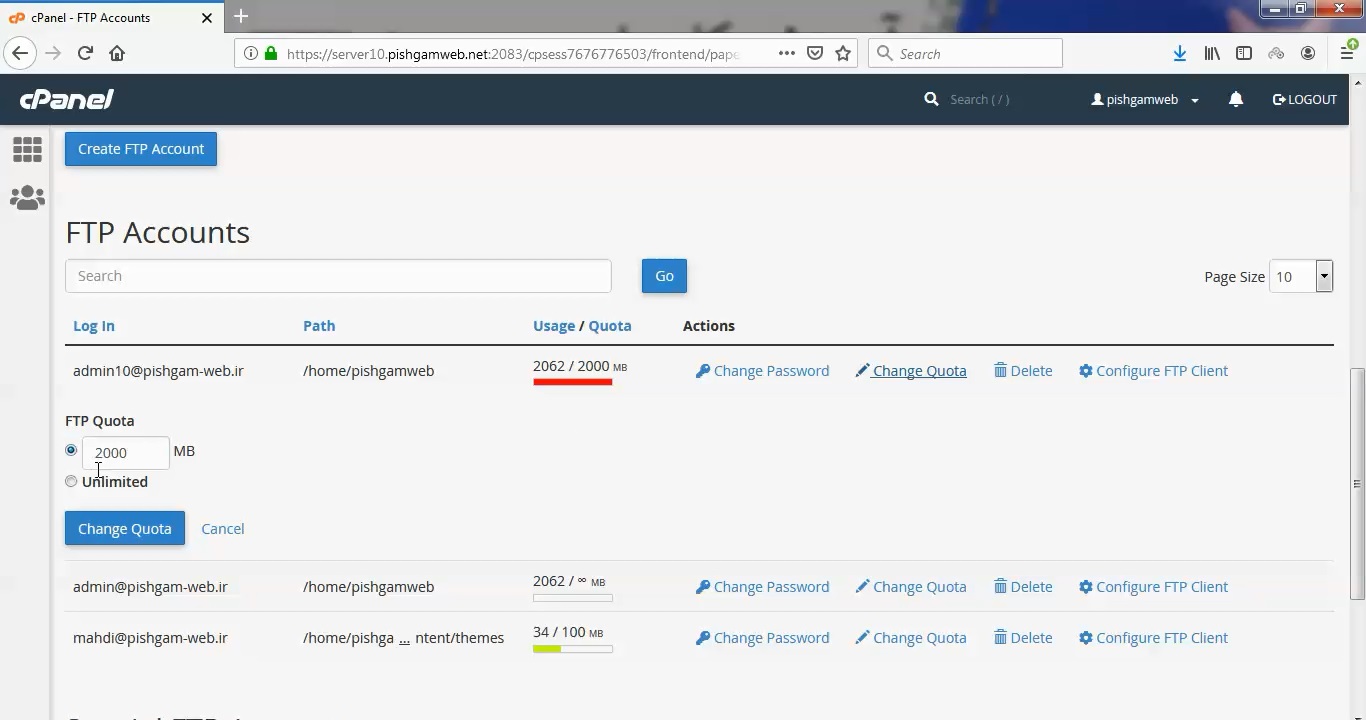
با کلیک روی گزینه Change Quota میتوانید محدودیت حجم را تغییر دهید.
با کلیک روی گزینه Change Password میتوانید پسورد یوزر اف تی پی را تغییر دهید.
با کلیک روی گزینه Delete میتوانید یوزر مورد نظر را حذف نمائید.
در قسمت Usage / Quota میتوانید میزان حجم مجاز مصرفی و حجم مصرف شده را مشاهده کنید.
در قسمت Path هم میتوانید دایرکتوری یوزر اف تی پی را مشخص کنید.
مشاهده فیلم آموزشی از سایت آپارات
برای دانلود فیلم آموزش از قسمت تنظیمات روی گزینه دانلود کلیک کرده و کیفیت مد نظر خود را انتخاب کنید تا فیلم آموزش دانلود گردد.
نکته : هر چقدر که عدد این قسمت بیشتر باشد ، کیفیت فیلم دانلودی بالاتر خواهد بود.
آموزش های ابتدایی :
دوستان عزیز آموزش که خدمتتون ارائه کردیم از سری آموزش های ابتدایی پیشگام وب هست و این آموزش جزو پایه ای ترین آموزش های سایت هست امیدوارم که آموزشممون کامل باشه.
منتظر نظرات و پیشنهادات شما در قسمت دیدگاه های سایت هستیم.
learn from cpanel
Overview
You can use this interface to create and manage your website’s File Transfer Protocol (FTP) accounts. FTP allows you to manage your website’s files.Note:
- You can only access this interface if your hosting provider has enabled FTP services on your server.
- To determine which FTP server daemon that your server uses, contact your hosting provider. cPanel & WHM supports the ProFTPD and Pure-FTPd FTP server daemons.
- On servers that use Pure-FTPd, the system will only return the first 2,000 files in each folder. Your hosting provider can adjust this number.
- If the account uses a dedicated IP address, you can use your cPanel account’s username and password to log in to FTP. Otherwise, you must use the full FTP account username (account, at-symbol, and domain name) and password to log in to FTP.
- You can use your cPanel account’s username and password to log in to FTP.
- SSH File Transfer Protocol (SFTP) allows you to transfer files over a secure connection. For more information about SFTP, read our How To Configure Your SFTP Client documentation.
- To view past FTP connections to your site, navigate to the Raw Access interface (cPanel >> Home >> Metrics >> Raw Access).
Add FTP Account
To create an FTP account, perform the following steps:
- Enter the desired username in the Log In text box.
- Select the desired domain from the Domain menu.
- Enter and confirm the new password in the appropriate text boxes. Note:
- The system evaluates the password that you enter on a scale of 100 points.
0indicates a weak password, while100indicates a very secure password. - Some web hosts require a minimum password strength. A green password Strength meter indicates that the password is equal to or greater than the required password strength.
- Click Password Generator to generate a strong password. For more information, read our Password & Security documentation.
- The system evaluates the password that you enter on a scale of 100 points.
- Enter the FTP account’s home directory. Note:
- The Directory text box defines the new FTP account’s top level of directory access. For example, if you enter example in the Directory text box, the FTP account can access the
/home/$user/example/directory and all of its subdirectories. - The system automatically populates this text box with
public_html/domain.tld/account, whereaccountrepresents the username that you entered in the Login text box anddomain.tldrepresents the domain you selected in the Domain menu. Important: You cannot use symbolic links (symlinks) to upload data outside of this directory.
- The Directory text box defines the new FTP account’s top level of directory access. For example, if you enter example in the Directory text box, the FTP account can access the
- Enter the disk space quota, or select Unlimited. Note: If your server uses the ProFTPd FTP server, you cannot use quotas. For more information about your server’s FTP server, contact your hosting provider. Important: If an FTP account experiences problems with uploads, you may need to increase the Quota value.
- Click Create FTP Account. The new account will appear in the FTP Accounts table.
FTP Accounts
The FTP Accounts table allows you to manage existing FTP accounts.
Change Password
To change an FTP account’s password, perform the following steps:
- Click Change Password for the FTP account for which you wish to change the password.
- Enter and confirm the new password in the appropriate text boxes. Note:
- The system evaluates the password that you enter on a scale of 100 points.
0indicates a weak password, while100indicates a very secure password. - Some web hosts require a minimum password strength. A green password Strength meter indicates that the password is equal to or greater than the required password strength.
- Click Password Generator to generate a strong password. For more information, read our Password & Security documentation.
- The system evaluates the password that you enter on a scale of 100 points.
- Click Change Password.
Change Quota
Remember: If your server uses the ProFTPd FTP server, you cannot use quotas. For more information about your server’s FTP server, contact your hosting provider.
To change an FTP account’s quota, perform the following steps:
- Click Change Quota for the FTP account for which you wish to change the quota.
- Enter the disk space quota, or select Unlimited.
- Click Change Quota.
Delete
To remove an FTP account, perform the following steps:
- Click Delete for the FTP account that you wish to remove.
- Click the desired deletion option:
- Delete Account — Remove the FTP account only. This will not remove the files that the FTP account’s home directory contains.
- Delete Account and Files — Remove the FTP account and all of the files that the FTP account’s home directory contains.Warning: Only use this option with extreme caution. If the FTP account that you delete can access the
public_htmldirectory, this option automatically removes thepublic_htmldirectory and all of its contents, which will break your website. - Cancel — Do not delete the account.
Configure FTP Client
Important:
You must install the FTP client on your computer before you download and run the script file.
- For instructions, visit the Core FTP website for Windows® computers or the Cyberduck website for MacOS® computers.
- If you encounter problems when you try to automatically configure your FTP client, ensure that your client is properly installed on your computer. If problems persist, consult your FTP client’s documentation.
To configure an FTP client, perform the following steps:
- Click Configure FTP Client for the desired FTP account.
- Click FTP Configuration File under the desired FTP client’s logo. You can choose between Core FTP and Cyberduck. Note:
- We only support auto-configuration for these FTP clients. To use another client, manually configure the client.
- Click Instructions to view detailed instructions for your chosen client.
- FTP does not support Server Name Indication (SNI). You must use the server’s hostname as the FTP server to connect with SSL. You can’t use your domain name. For more information, read our How To Configure Your SFTP Client documentation.
- Open the configuration script file that downloaded to your computer. The FTP client automatically opens, configures itself, and connects to your FTP server.
Special FTP Accounts
The Special FTP Accounts table lists your cPanel account’s primary FTP account and the log access account. The system creates these accounts by default. Unlike other FTP accounts, you cannot modify or delete these accounts. This is because the system links these accounts to administrative aspects of your cPanel account.Note:
To log in to a special FTP account, you must use the account’s FTP configuration file. The system automatically configures the client for these accounts. For more information about FTP client configuration files, read the Configure FTP client section.
Primary FTP account
This account has FTP access to all files in your cPanel account. It also has access to files that exist outside of your account’s public_html directory. When logging in to this account, you should always use the SFTP (Secure File Transfer Protocol) protocol.
Log access account
This account lets you download your website’s raw access logs. The logs are available in the /etc/apache2/logs/domlogs/USERNAME directory, where USERNAME is the log access account’s username. This directory contains the FTP transaction logs for domains on webservers running EasyApache 4.Note:
You don’t need to log in to this account to access the FTP transaction logs.
Anonymous FTP accounts
These accounts allow users to anonymously connect via FTP to access your website’s files. You can manage this access in cPanel’s Anonymous FTP interface (cPanel >> Home >> Files >> Anonymous FTP). When you disable anonymous FTP, the system does not remove these accounts. Important:
This feature is only available if your hosting provider enables it.