 ایمیل
ایمیل  چت آنلاین
  پشتیبانی
 آموزش کار با File and Directory Restoration در cpanel
دوستان عزیز پیشگام وبی امیدوارم که حالتون خوب باشه ، امروز با آموزش کار با File and Directory Restoration در cpanel خدمتتون هستیم و امیدوارم توضیحاتی که در این مطلب و یا در انتها مطلب که بصورت فیلم قرارداده شده بتونه به شما کمک کنه و هر روز بیشتر پیشرفت کنید.
خوب اصلا این قسمت به چه دردی میخوره کجا بهش نیاز داریم و در کل کاربردش چی هست؟
در این بخش شما قادر خواهید بود تا فایل ها و دایرکتوری های خودتان را از بک آپ های موجود ریستور کنید.
ابتدا وارد هاستمون داخل سایت پیشگام وب میشویم.
میتوانید از سایت پیشگام وب قسمت سرویس های من ، سرویس مورد نظر را انتخاب کرده و ورود به سی پنل را بزنید تا بصورت اتوماتیک وارد هاستتون بشید و همچنین میتوانید از لینک سایت خودتون ، البته اگر که دی ان اس های ( DNS ) پیشگام وب را درست ست کرده باشید و 24 ساعت گذشته باشد از طریق پورت 2082 و یا 2083 وارد بشید.
فقط نکته ای که هست و باید بهش توجه کنید ، اگر سایت را با http باز میکنید از پورت 2082 و اگر با https باز میکنید از 2083 استفاده کنید ، نمونه لینک در زیر مشخص شده است.
البته به این نکته توجه داشته باشید که باید جای آدرس سایت ما آدرس سایت خودتان را وارد کنید.
راه آخر جهت لاگین هم در صورتی که دی ان اس ها ( DNS ) را ست نکرده اید یا 24 ساعت از تنظیم آنها نگذشته است و دوست ندارید بطور مثال اطلاعات ناحیه کاربری رو به طراح بدید استفاده از لینک پیشفرض پیشگام وب هست که در زمان خرید هاست برای شما ارسال شده و اگر هم نتونستید پیدا کنید میتوانید تیکت بدهید تا به شما داده شود ، پایین هم میتوانید نمونه لینک رو مشاهده کنید.
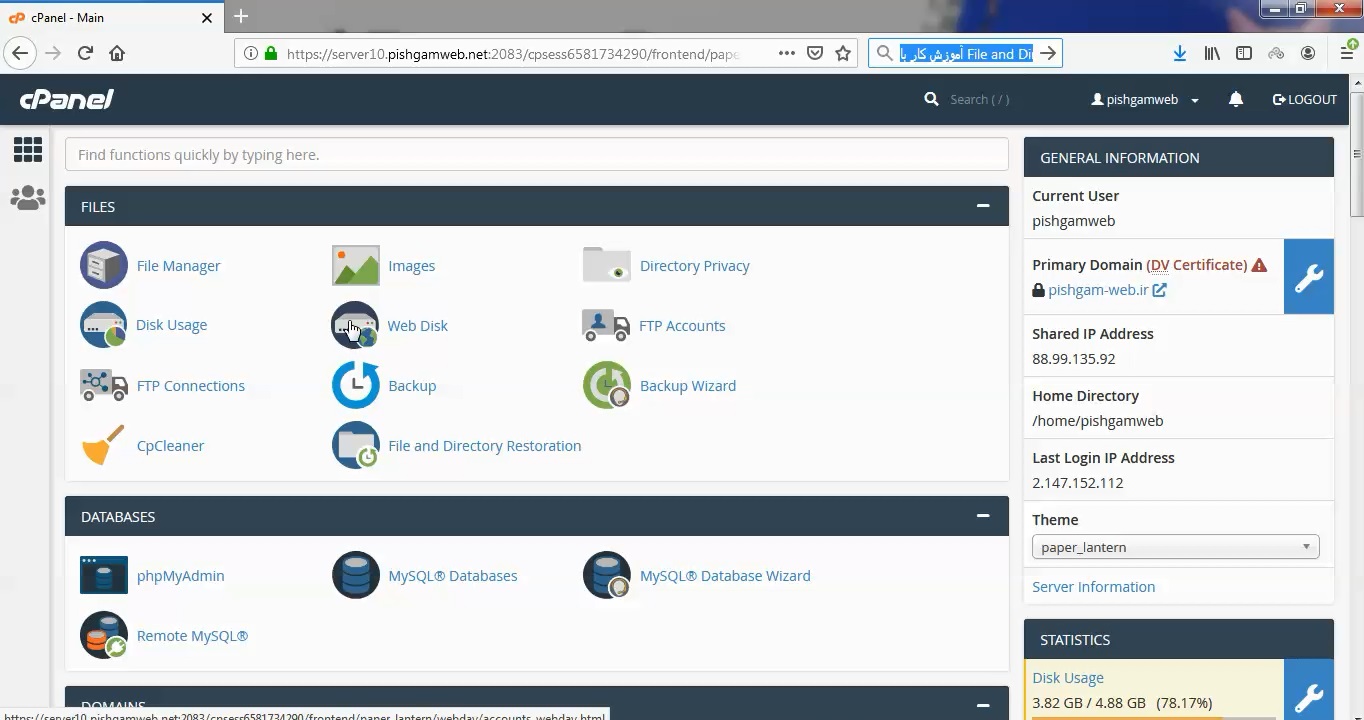
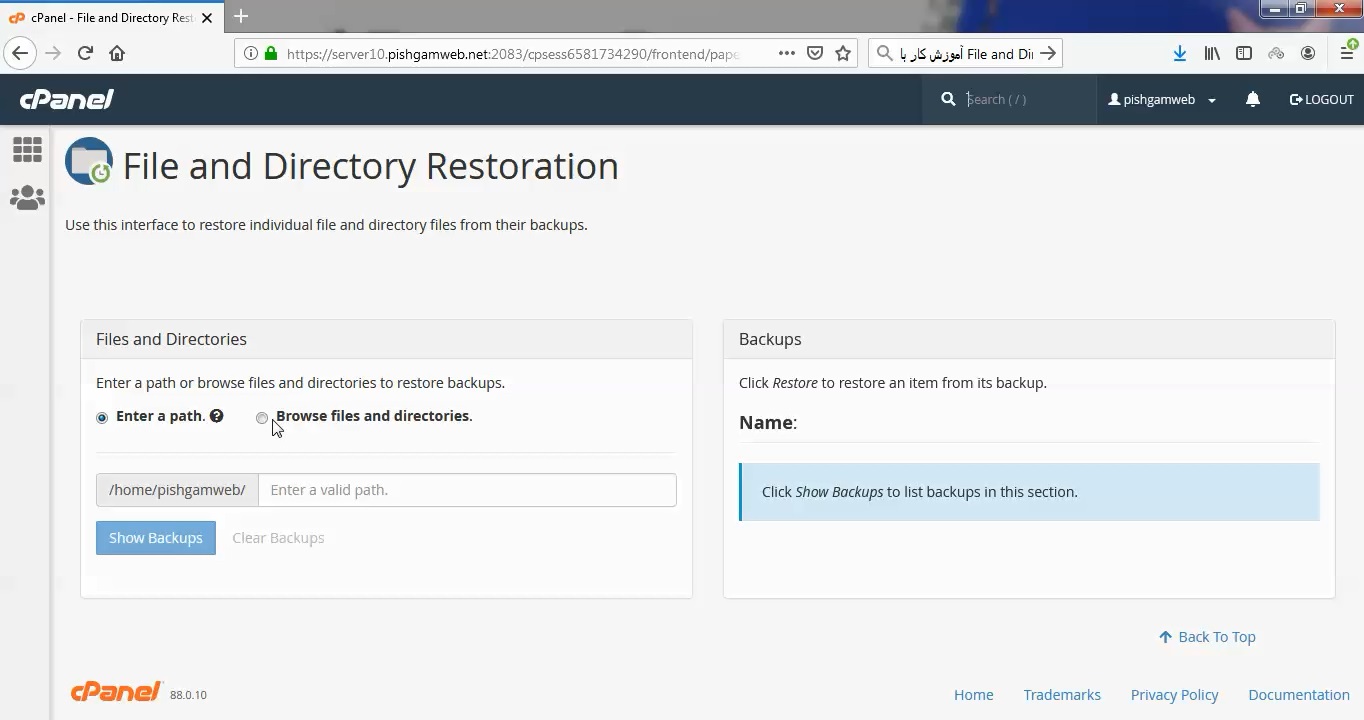
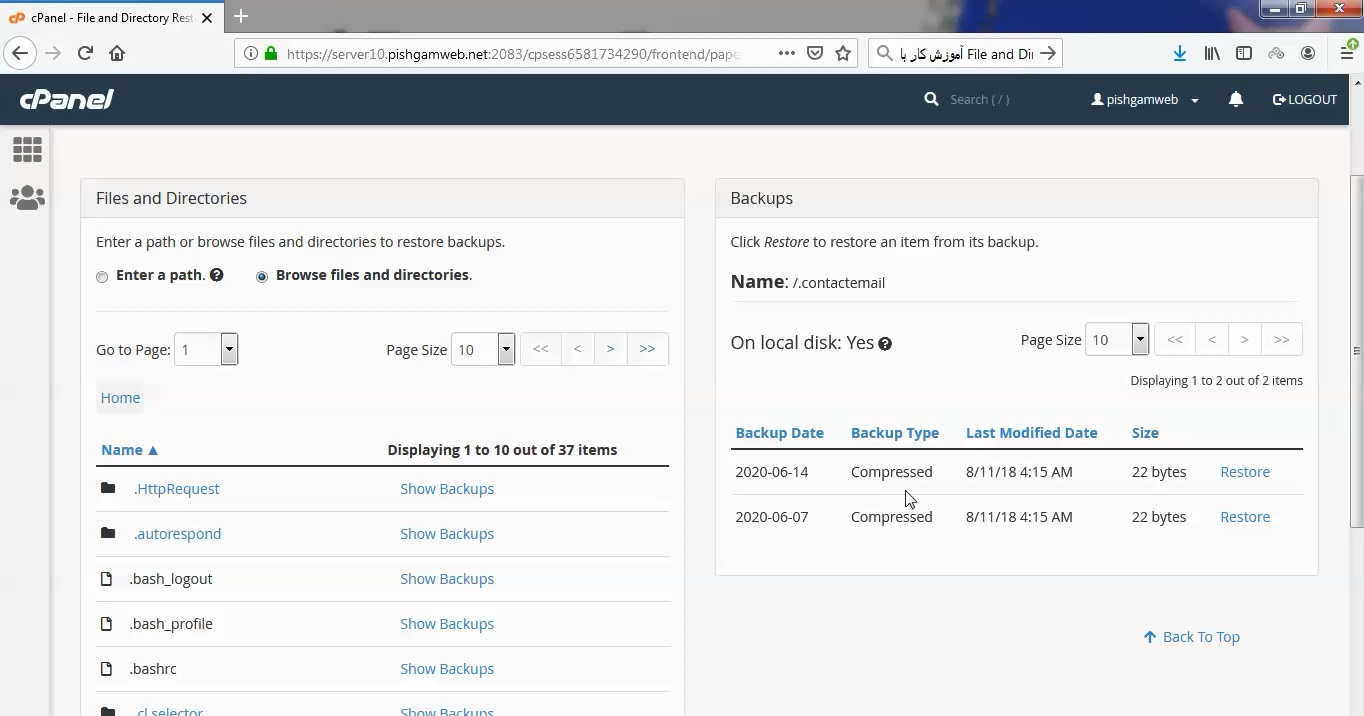
بعد از ورود به بخش مروبطه از قسمت Files and Directories روی گزینه Browse files and directories. کلیک کنید.
در قسمت سمت راست Backups بک آپ ها نمایش داده خواهد شد.
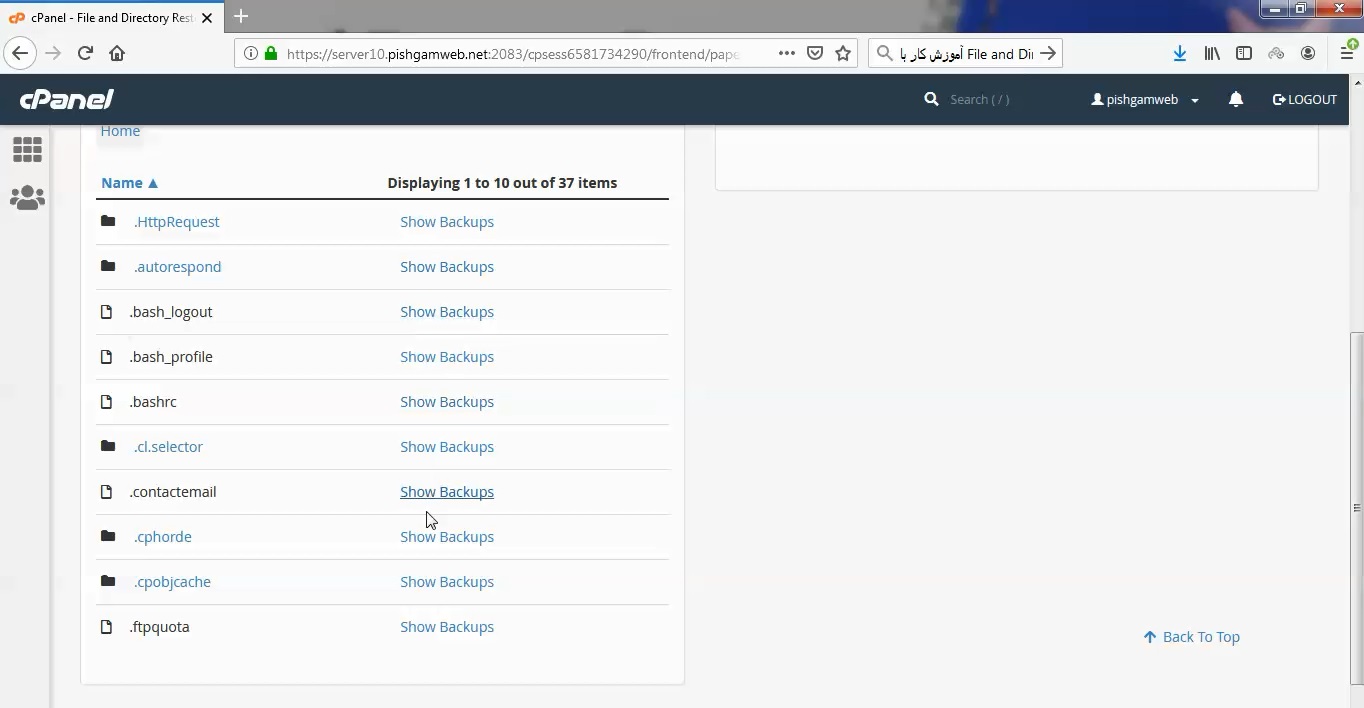
تمامی بخش ها مشخص شده است و هر یک که مد نظر بود روی گزینه show backups کلیک کنید.
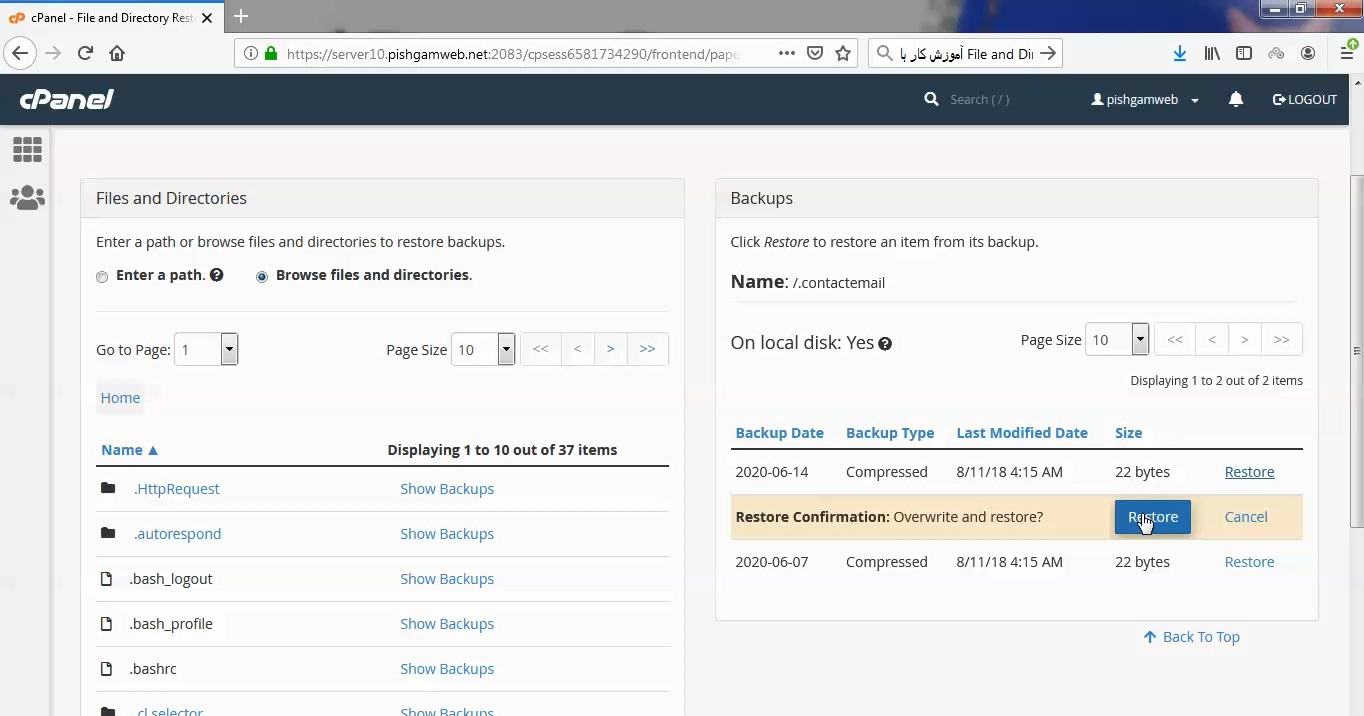
در قسمت Backups دو عدد بک اپ موجود هست که تاریخ و حجم آن نیز مشخص میباشد.
روی گزینه Restore کلیک کرده و دوباره هم Restore را انتخاب کنید تا ریستور انجام گردد.
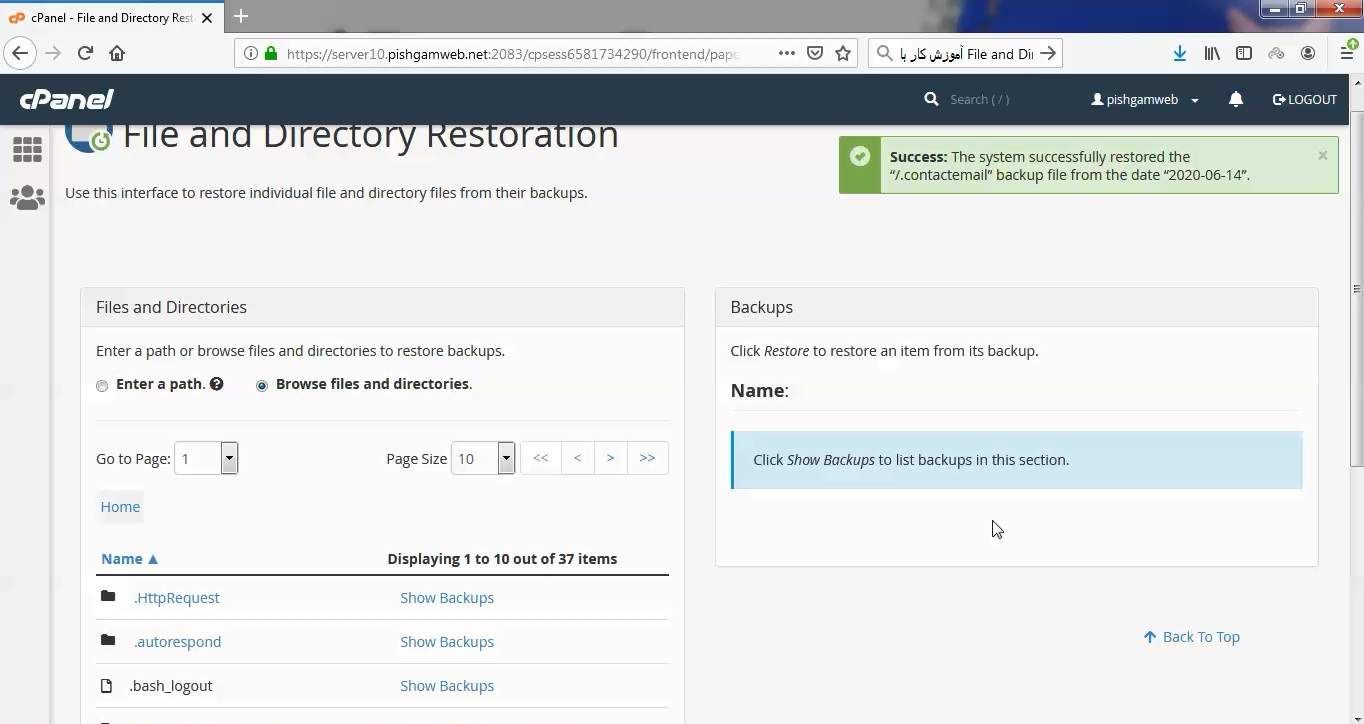
در انتها و با انجام ریستور پس از چند ثانیه یا دقیقه پیام سبز رنگ مبنی بر اتمام ریستور را مشاهده میکنید.
مشاهده فیلم آموزشی از سایت آپارات
برای دانلود فیلم آموزش از قسمت تنظیمات روی گزینه دانلود کلیک کرده و کیفیت مد نظر خود را انتخاب کنید تا فیلم آموزش دانلود گردد.
نکته : هر چقدر که عدد این قسمت بیشتر باشد ، کیفیت فیلم دانلودی بالاتر خواهد بود.
آموزش های متوسطه :
دوستان عزیز آموزش که خدمتتون ارائه کردیم از سری آموزش های ابتدایی پیشگام وب هست و این آموزش جزو آموزش های متوسطه هست که باعث میشه شما بتونید سایتتون رو بهتر از قبل مدیریت کنید.
learn from cpanel
Overview
The File and Directory Restoration interface allows you to restore items from local backup sources. You can enter a path or browse through files and directories to access backups.Note:
- This interface allows you to restore items from only local backup files. If you wish to restore items from remote backup files, you must transfer the desired remote backup files to the local server.
- This interface does not allow you to restore your account’s
.cpanelandmaildirectories. To restore these directories, you must perform a full account backup restoration. - The system will restore deleted files and will overwrite existing files.
The File and Directory Restoration interface
This interface contains two sections, Files and Directories and Backups. The Files and Directories section shows the files and directories that contain backups. The backups will appear in the Backups section.
You can access backups from this interface in two ways. You can enter a direct path to the file or directory, or you can browse through files and directories to find the file that you wish to restore.
Enter a direct path to restore a file or directory
Note:
Select Browse files and directories to view a directory’s contents. The system will not show a directory’s contents when you select Enter a path.
You can restore a file or directory from a direct path through your cPanel account’s home directory. To do so, perform the following steps:
- In the Files and Directories section, select Enter a path.
- Enter the direct path to the file or directory in the text box. The text box’s path is the cPanel account user’s home directory path. For example, enter
public_htmlin the text box for the direct path to the/home/user/public_htmldirectory. In this directory path,userrepresents the cPanel account’s username. - Click Show Backups to list the backups for that file or directory. The backups will appear in the Backups section of the interface.
- In the Backups section, choose the backup that you wish to restore and click Restore.
- The system will ask you to confirm the restoration. Click Restore to confirm. A success or failure message will appear.
Browse your home directory to restore a file or directory
You can browse through the home directory to find the file or directory that you wish to restore. To do so, perform the following steps:
- In the Files and Directories section, select Browse files and directories. The contents of the cPanel account user’s home directory will appear. To see a directory’s contents, click on the directory’s name.
- Click Show Backups to list the backups for that file or directory. The backups will appear in the Backups section of the interface.
- In the Backups section, choose the backup that you wish to restore and click Restore.
- The system will ask you to confirm the restoration. Click Restore to confirm. A success or failure message will appear.
Files and directories that you successfully restore will now appear in the home directory.