ایمیل
ایمیل  چت آنلاین
  پشتیبانی
 آموزش کار با Images در cpanel
دوستان عزیز پیشگام وبی امیدوارم که حالتون خوب باشه ، امروز با آموزش کار با Images در cpanel خدمتتون هستیم و امیدوارم توضیحاتی که در این مطلب و یا در انتها مطلب که بصورت فیلم قرارداده شده بتونه به شما کمک کنه و هر روز بیشتر پیشرفت کنید.
خوب اصلا این قسمت به چه دردی میخوره کجا بهش نیاز داریم و در کل کاربردش چی هست؟
با استفاده از ابزار مدیریت تصاویر سی پنل یا همان ابزار images می توان به سادگی و با چند کلیک تصاویر موجود در پوشه خاص را به صورت بند اندگشتی کنید یا سایز آن را به دلخواه خود تغییر دهید و حتی پسوند آن را به پسوند دیگری تغییر دهید ، در این مقاله قصد داریم ابزار مدیریت تصاویر سی پنل را به صورت ویدویی و همچنین آموزش متنی به شما توضیح دهیم.
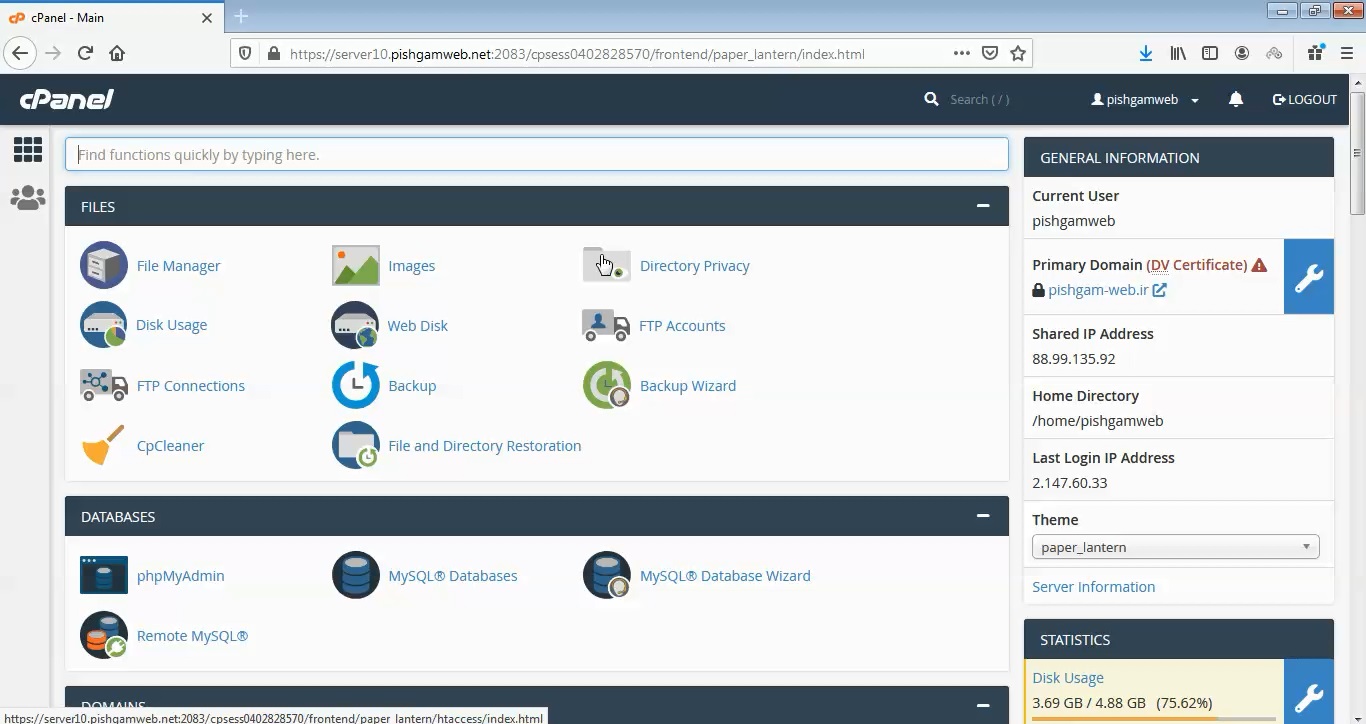
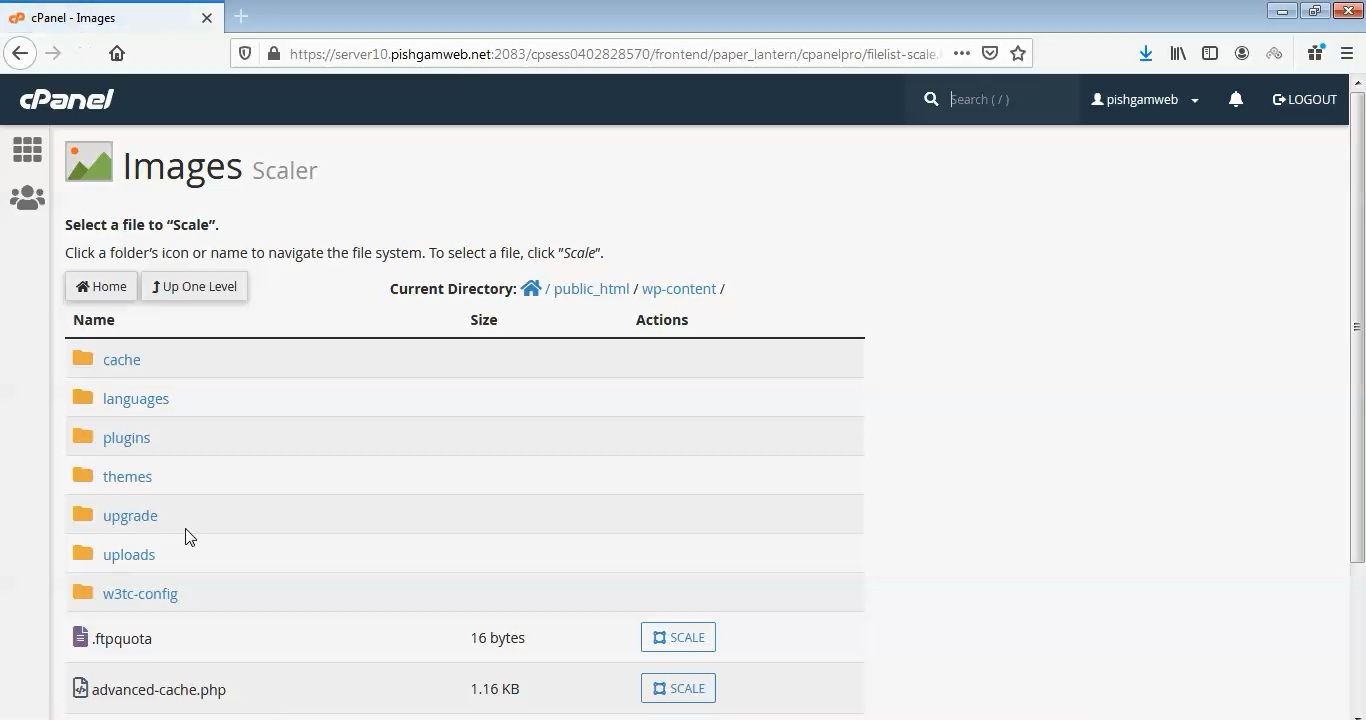
این قسمت برای تغییر پسورد در سی پنل میباشد که با عنوان Images در قسمت files موجود میباشد.
ابتدا وارد هاستمون داخل سایت پیشگام وب میشویم.
میتوانید از سایت پیشگام وب قسمت سرویس های من ، سرویس مورد نظر را انتخاب کرده و ورود به سی پنل را بزنید تا بصورت اتوماتیک وارد هاستتون بشید و همچنین میتوانید از لینک سایت خودتون ، البته اگر که دی ان اس های ( DNS ) پیشگام وب را درست ست کرده باشید و 24 ساعت گذشته باشد از طریق پورت 2082 و یا 2083 وارد بشید.
فقط نکته ای که هست و باید بهش توجه کنید ، اگر سایت را با http باز میکنید از پورت 2082 و اگر با https باز میکنید از 2083 استفاده کنید ، نمونه لینک در زیر مشخص شده است.
البته به این نکته توجه داشته باشید که باید جای آدرس سایت ما آدرس سایت خودتان را وارد کنید.
راه آخر جهت لاگین هم در صورتی که دی ان اس ها ( DNS ) را ست نکرده اید یا 24 ساعت از تنظیم آنها نگذشته است و دوست ندارید بطور مثال اطلاعات ناحیه کاربری رو به طراح بدید استفاده از لینک پیشفرض پیشگام وب هست که در زمان خرید هاست برای شما ارسال شده و اگر هم نتونستید پیدا کنید میتوانید تیکت بدهید تا به شما داده شود ، پایین هم میتوانید نمونه لینک رو مشاهده کنید.
Thumbnailer
Create thumbnails from images in a directory
در این قسمت میتوانید از تمامی عکس های داخل پوشه مد نظر یک نسخه بند انگشتی تهیه کنید.
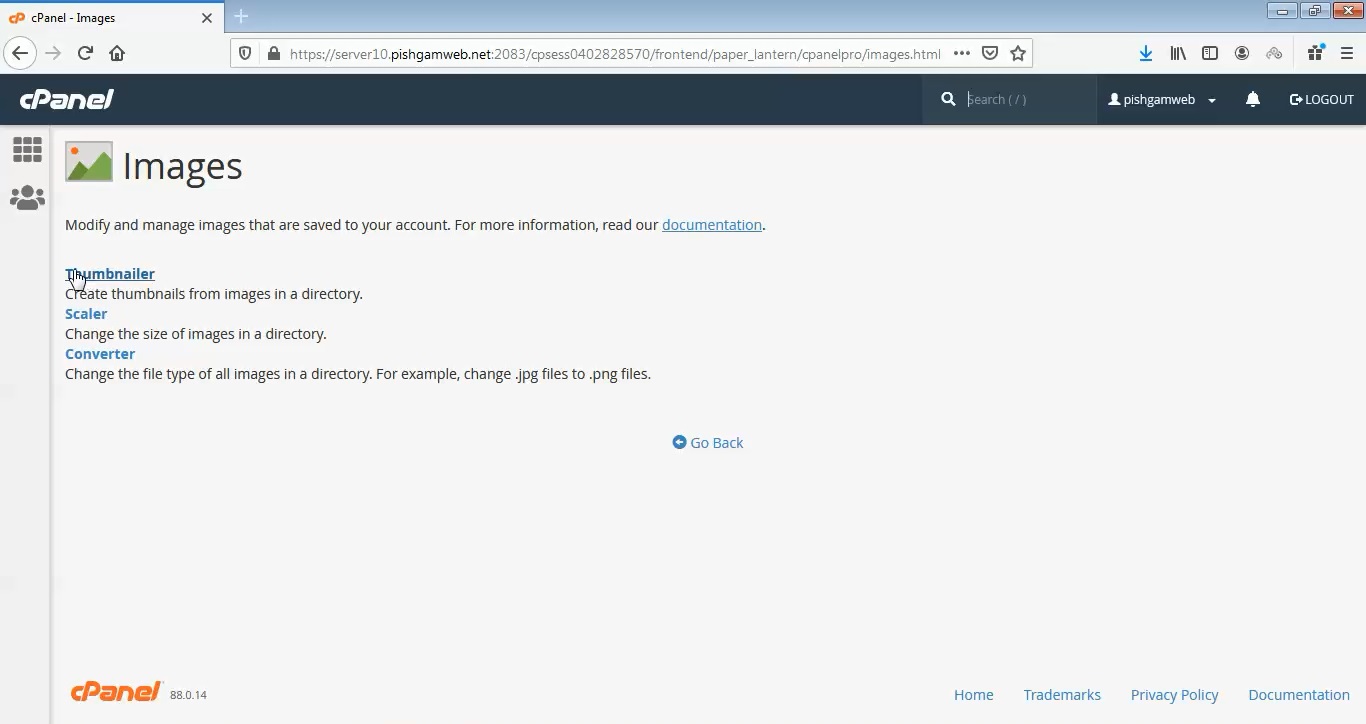
Scaler
Change the size of images in a directory
از این قسمت میتوانید سایز عکس را تغییر دهید.
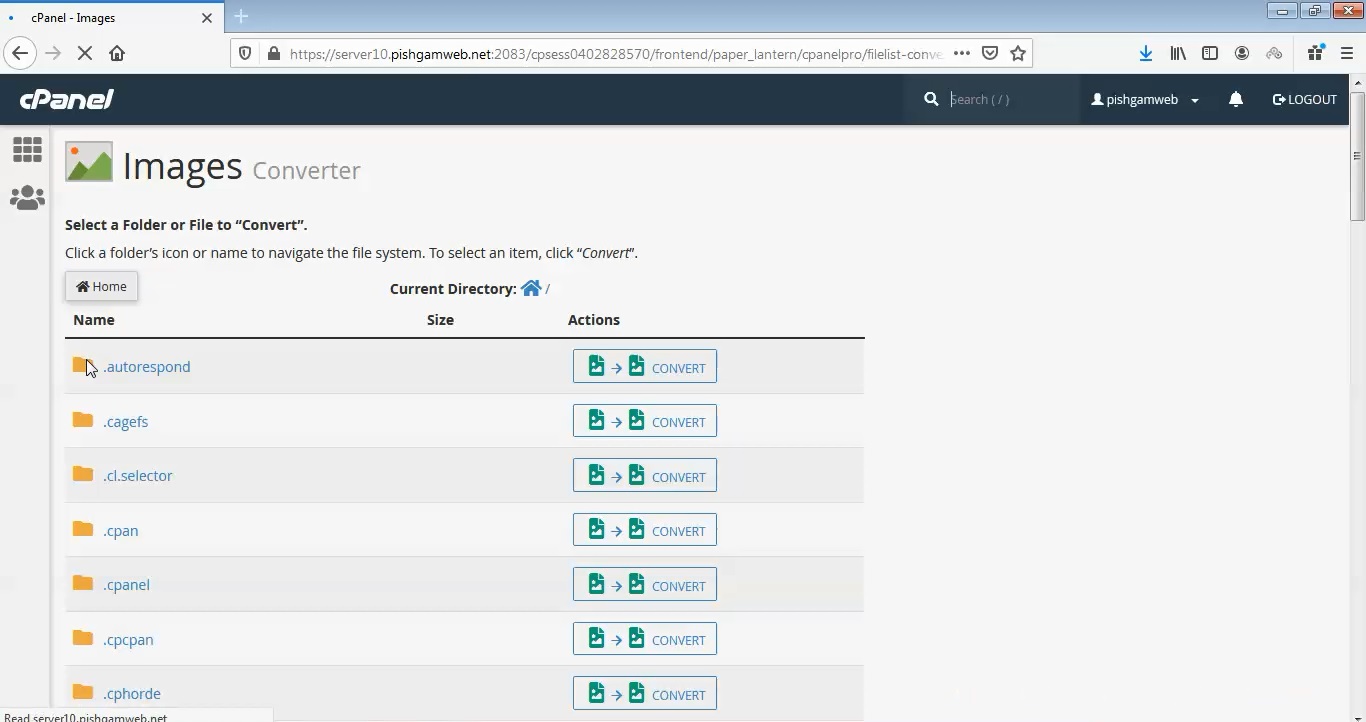
Converter
Change the file type of all images in a directory. For example, change .jpg files to .png files.
از این قسمت میتوانید بصورت کلی فرمت تمامی فایل ها را تغییر دهید.
مشاهده فیلم آموزشی از سایت آپارات
برای دانلود فیلم آموزش از قسمت تنظیمات روی گزینه دانلود کلیک کرده و کیفیت مد نظر خود را انتخاب کنید تا فیلم آموزش دانلود گردد.
نکته : هر چقدر که عدد این قسمت بیشتر باشد ، کیفیت فیلم دانلودی بالاتر خواهد بود.
آموزش های متوسطه :
دوستان عزیز آموزش که خدمتتون ارائه کردیم از سری آموزش های ابتدایی پیشگام وب هست و این آموزش جزو آموزش های متوسطه هست که باعث میشه شما بتونید سایتتون رو بهتر از قبل مدیریت کنید.
learn from cpanel
Overview
The Images interface allows you to modify and manage images that you saved to your account. This feature includes the following tools:
- Thumbnailer — Use this tool to create thumbnails from images in a directory and store them in a
thumbnailssubdirectory. - Scaler — Use this tool to resize individual images.
- Converter — Use this tool to convert one image file type to another file type and change the file type of all images in a directory. For example, you can change
.jpgfiles to.pngfiles.
Thumbnailer
Click Thumbnailer to create smaller versions of images (thumbnails).
- For example, create thumbnails to conserve bandwidth on a photo page, where visitors can view smaller previews of your images before you access the larger ones.
- The Thumbnailer tool creates a new
thumbnailssubdirectory within the selected folder. - The system adds the
tn_prefix to thumbnail images’ filenames. For example, the system creates thetn_image.pngthumbnail image for theimage.pngfile.
To convert a directory of images to thumbnails, perform the following steps:
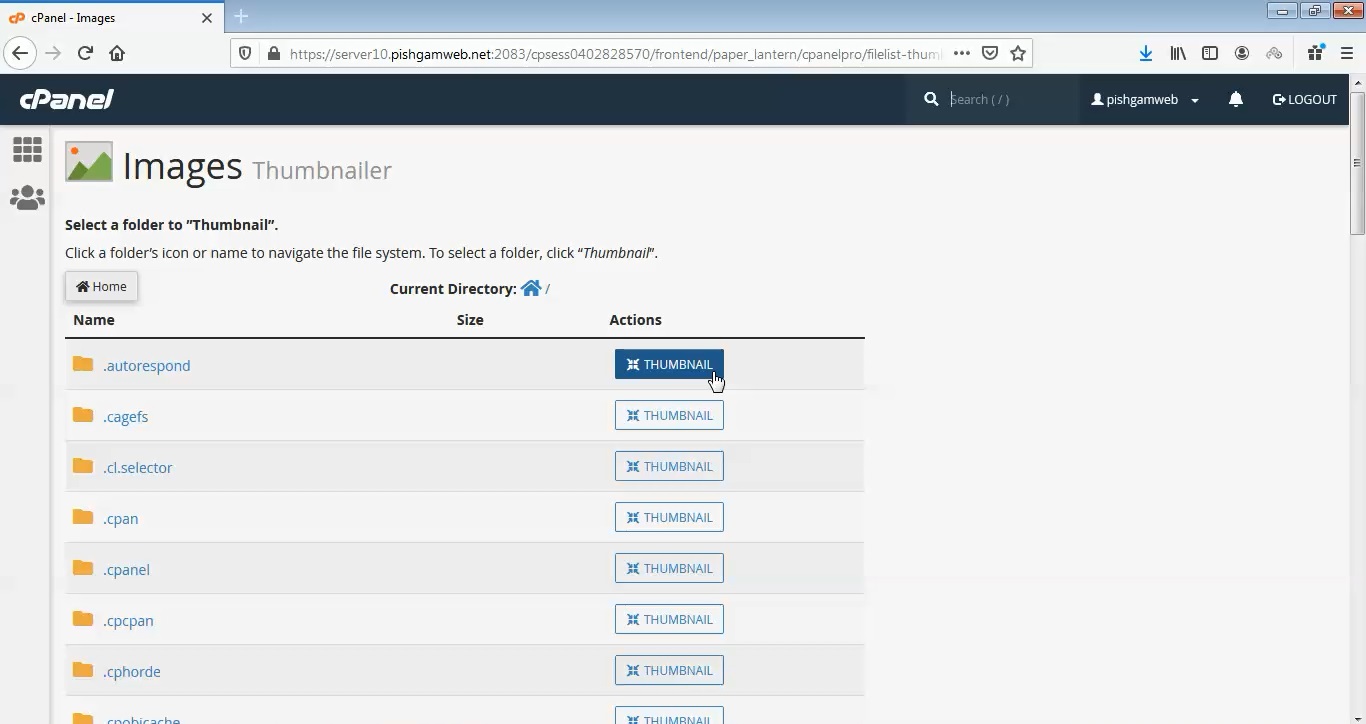
- Locate the folder that contains the images that you wish to convert.Note: You must select an entire folder to convert to a thumbnail. The Thumbnailer tool cannot convert individual images.
- Click the folder icon or the folder’s name to navigate the file system.
- Click Thumbnail to select the folder.
- In the Scale Percent text boxes, enter the percentage by which you wish to shrink your images.
- Select the Keep Aspect Ratio checkbox to ensure that the image’s dimensions remain proportional, to prevent the distortion of the image.
- Click Reset Dimensions to reset the Scale Percent values to the default.
- Click Thumbnail Images.
- After the Thumbnailer converts your images into thumbnails, the following message will appear:
The system successfully converted your images into thumbnail images and stored them in the following location: /home/user/.cpanel/thumbnails/tn_* - Click the thumbnail path to open the directory in cPanel’s File Manager interface (cPanel >> Home >> Files >> File Manager).
- After the Thumbnailer converts your images into thumbnails, the following message will appear:
Scaler
Click Scaler to enlarge or shrink an image.
To resize an image, perform the following steps:
- Navigate to the folder that contains the image to resize.
- Locate the image that you wish to resize and click Scale.
- To set the new image size, perform either of the following two steps:
- Use the New Dimensions text boxes to define, in pixels, the desired image size.
- Use the Percent text boxes to define the percentage by which you wish to resize your images.
- Select the Keep the current aspect ratio checkbox to ensure that the image’s dimensions remain proportional, to prevent the distortion of the image.
- Click Reset Dimensions to reset the Percent values to the default.
- Select the Retain a copy of the old image as checkbox to store a copy of the original image. Specify the file path at which to save the copy in the text box.
- Click Scale Image. A success message will appear.
Converter
Click Converter to convert any of the supported file types from one type to another.
To change an image’s file type, perform the following steps:
- Select the folder or file that you wish to convert.
- Click the folder icon or the folder’s name to navigate the file system.
- Click Convert to select the folder or file.
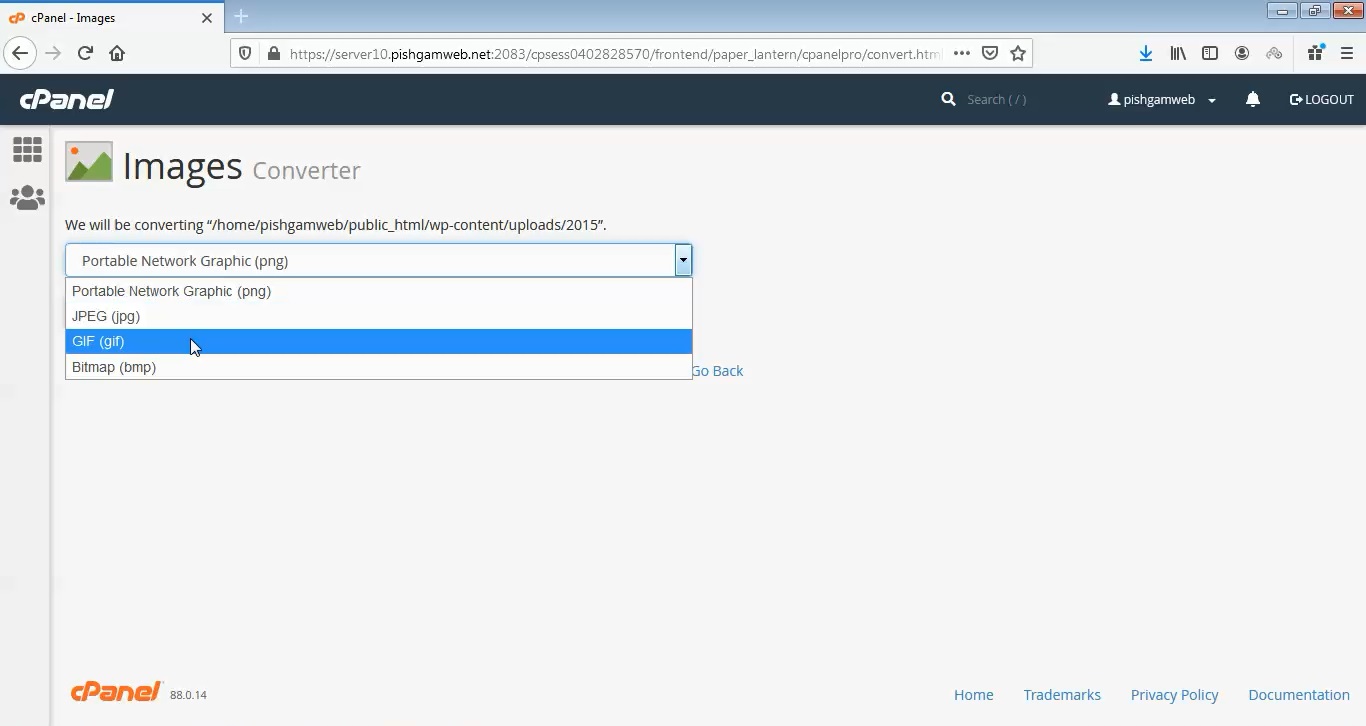
- From the menu, select the file format to which to convert your image or images. You may select any of the following file formats:
.PNG.JPG.GIF.BMP
- Click Convert. A success message will appear. The system saves the new file in the same directory as the original file