ایمیل
ایمیل  چت آنلاین
  پشتیبانی
 آموزش کار با Domains در cpanel
دوستان عزیز پیشگام وبی امیدوارم که حالتون خوب باشه ، امروز با آموزش کار با Domains در cpanel خدمتتون هستیم و امیدوارم توضیحاتی که در این مطلب و یا در انتها مطلب که بصورت فیلم قرارداده شده بتونه به شما کمک کنه و هر روز بیشتر پیشرفت کنید.
خوب اصلا این قسمت به چه دردی میخوره کجا بهش نیاز داریم و در کل کاربردش چی هست؟
در ورژن 76.0.6 سی پنل گزینه جدیدی به نام Domains اضافه شده است که کار مدیریت همه دامنه ها و ساب دامنه هایی که در سی پنل وجود دارد را راحت تر کرده است. با استفاده از Domains می توانید براحتی دامنه یا ساب دامنه به هاست سی پنل خود اضافه نمایید. می توانید دامنه هایی را که قبلا اضافه شده است را ببینید و حتی تنظیمات آنها را از همینجا تغییر دهید. از طریق Domains براحتی می توانید ساب دامنه ، Aliases و Addon domain به سی پنل اضافه کنید.
در حیقیت در این قسمت براحتی میتوانید تمامی ادان دومین ، پارک دومین ، ساب دومین و مین دومین که دومین اصلی هاست هست را مشاهده کنید و هر تغییری که مد نظر هست را انجام دهید.
این قسمت برای تغییر پسورد در سی پنل میباشد که با عنوان Domains در قسمت Domains موجود میباشد.
ابتدا وارد هاستمون داخل سایت پیشگام وب میشویم.
میتوانید از سایت پیشگام وب قسمت سرویس های من ، سرویس مورد نظر را انتخاب کرده و ورود به سی پنل را بزنید تا بصورت اتوماتیک وارد هاستتون بشید و همچنین میتوانید از لینک سایت خودتون ، البته اگر که دی ان اس های ( DNS ) پیشگام وب را درست ست کرده باشید و 24 ساعت گذشته باشد از طریق پورت 2082 و یا 2083 وارد بشید.
فقط نکته ای که هست و باید بهش توجه کنید ، اگر سایت را با http باز میکنید از پورت 2082 و اگر با https باز میکنید از 2083 استفاده کنید ، نمونه لینک در زیر مشخص شده است.
البته به این نکته توجه داشته باشید که باید جای آدرس سایت ما آدرس سایت خودتان را وارد کنید.
راه آخر جهت لاگین هم در صورتی که دی ان اس ها ( DNS ) را ست نکرده اید یا 24 ساعت از تنظیم آنها نگذشته است و دوست ندارید بطور مثال اطلاعات ناحیه کاربری رو به طراح بدید استفاده از لینک پیشفرض پیشگام وب هست که در زمان خرید هاست برای شما ارسال شده و اگر هم نتونستید پیدا کنید میتوانید تیکت بدهید تا به شما داده شود ، پایین هم میتوانید نمونه لینک رو مشاهده کنید.
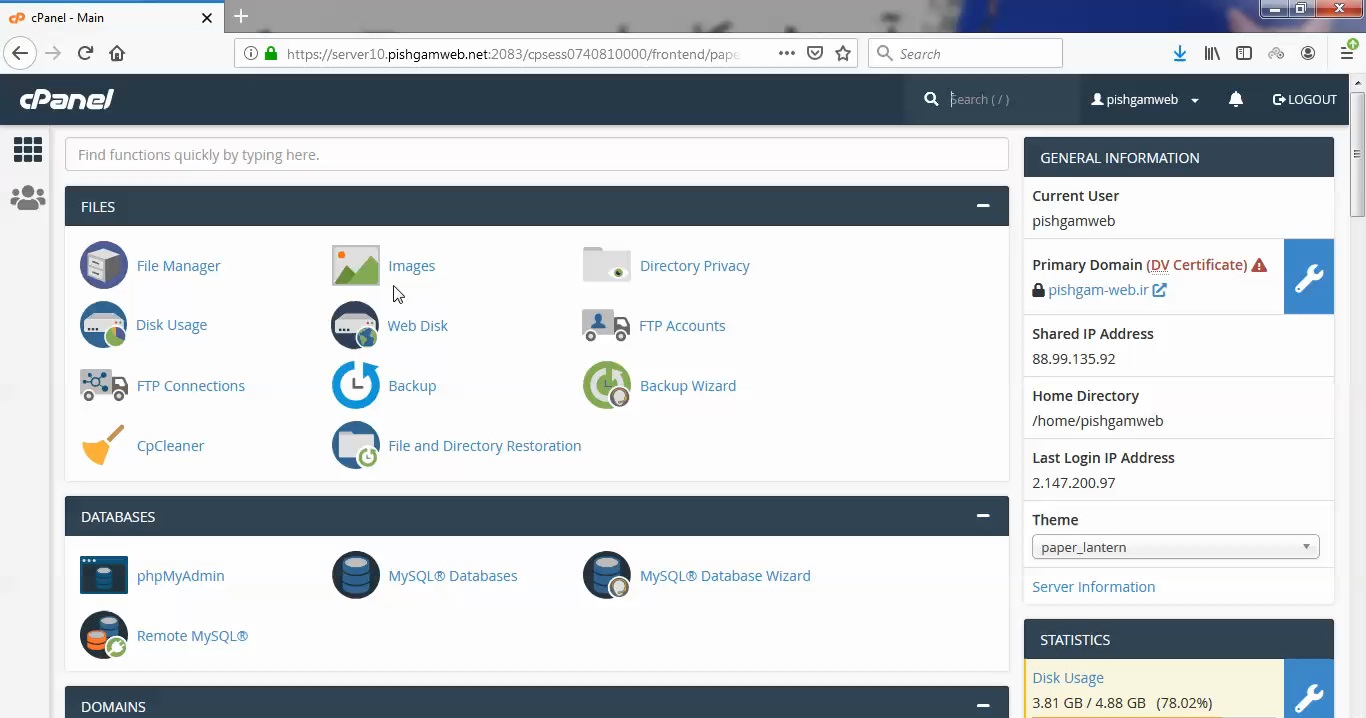
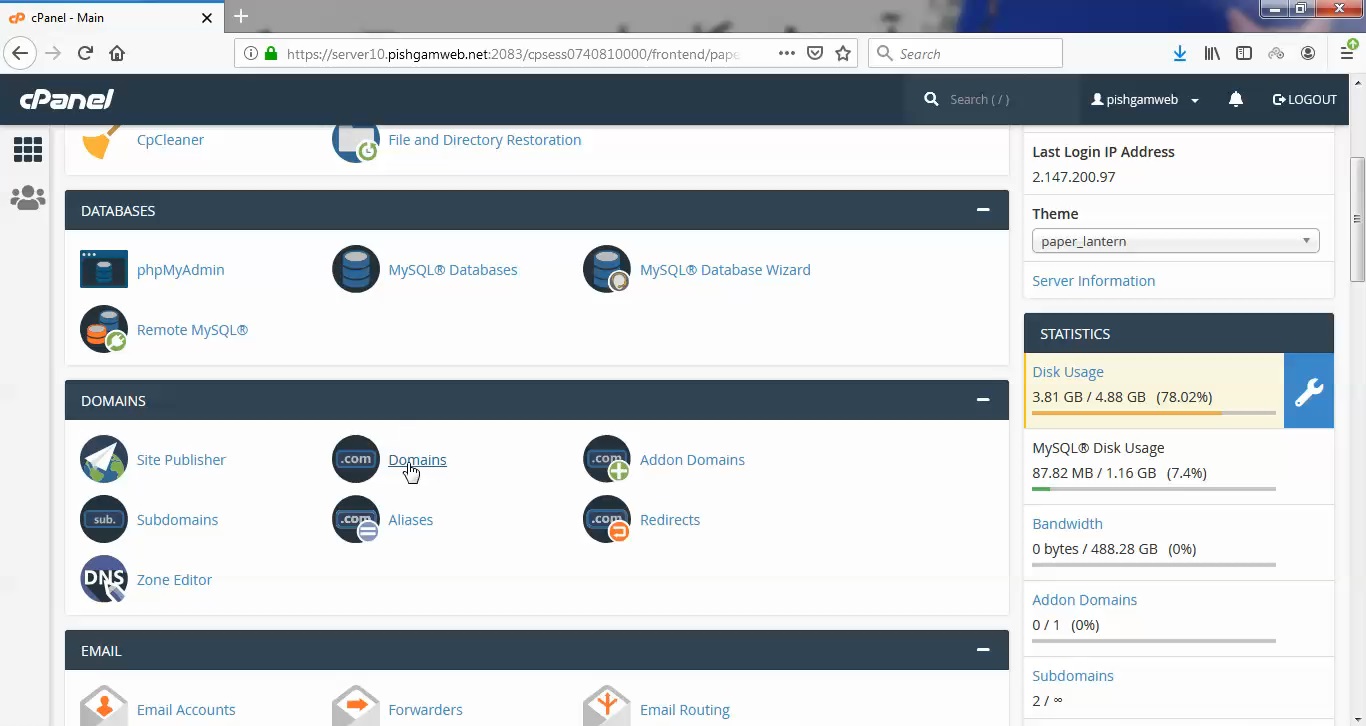
در قسمت Domains روی گزینه Domains کلیک میکنیم.
توضیحات هر تب بصورت جداگانه در زیر قرار دارد.
در قسمت Domain مطابق تصویر زیر تمامی دامین ها بصورت مین دومین ، پارک دومین ، اد دومین و ساب دومین وجود دارد.
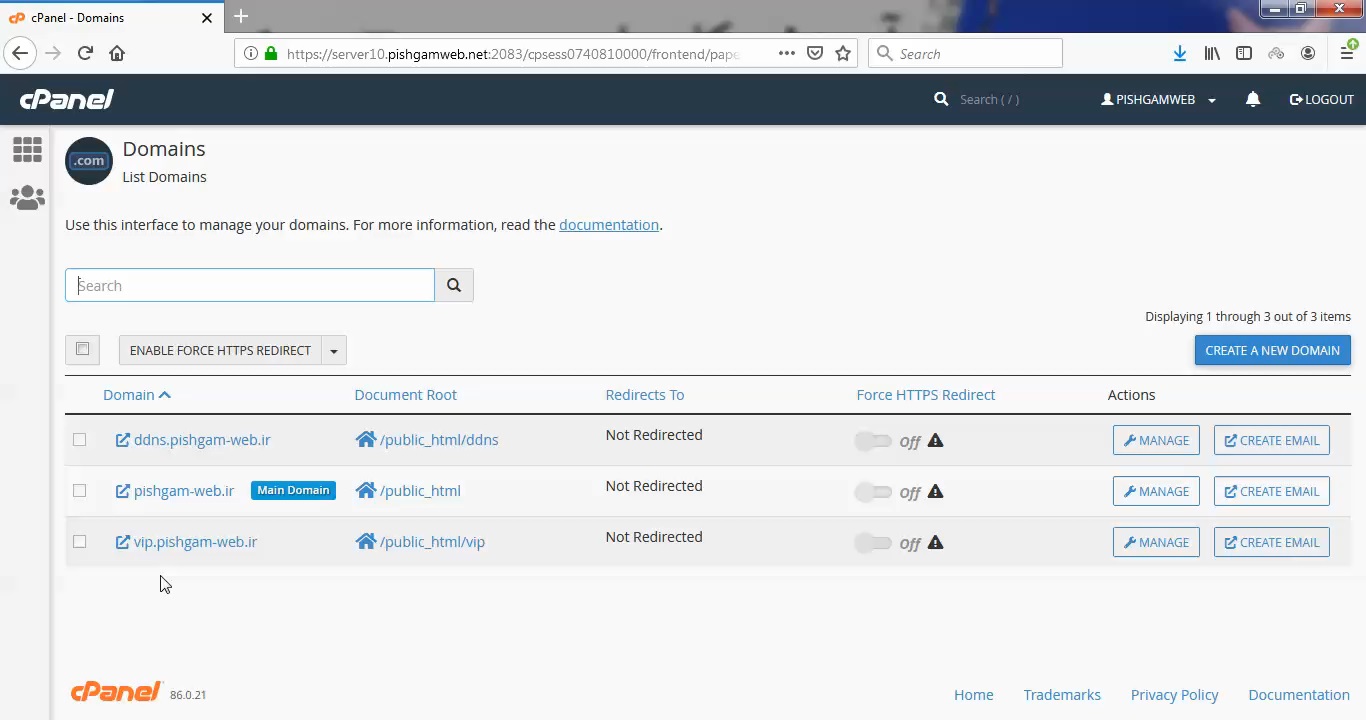
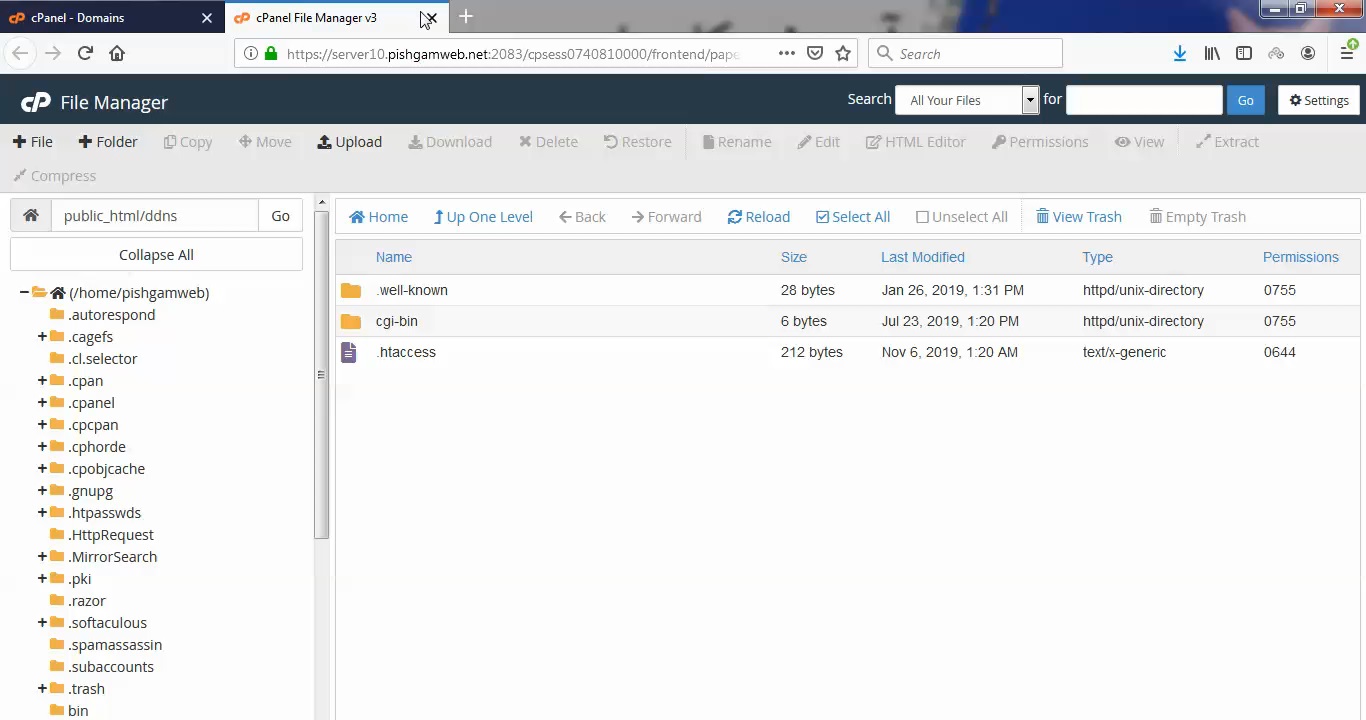
در قسمت Document Root پوشه روت هر یک از دامین ها مشخص شده است که اگر روی آن کلیک کنید به پوشه مد نظر هدایت میشوید.
که تصویر زیر گویاست که ما کلیک کرده و پوشه روت ساب دومین اول باز میشود.
در قسمت Redirects To اگر که دامین را ( مین دومین ، پارک دومین ، اد دومین و ساب دومین ) ریداکت کرده باشید ، آدرس مورد نظر مشخص میگردد و اگر ریداکت نکرده باشید متن Not Redirected نمایش داده میشود.
در قسمت Force HTTPS Redirect میتوانید تنظیم کنید سایت فقط با https باز گردد یا به عبارتی ریداکت به https گردد.
حالت دیفالت Force HTTPS Redirect بصورت OFF که رای فعال کردن روی همین قسمت باید کلیک کنید اما مطابق تصویر زیر اجازه اینکار به ما داده نشده و علت اون هم این هست که ssl روی هاست ما نصب نیست اگر شما هم همین ارور را داشتید مطابق آموزش های قبلی ما ssl را نصب کرده و سپس چک کنید.

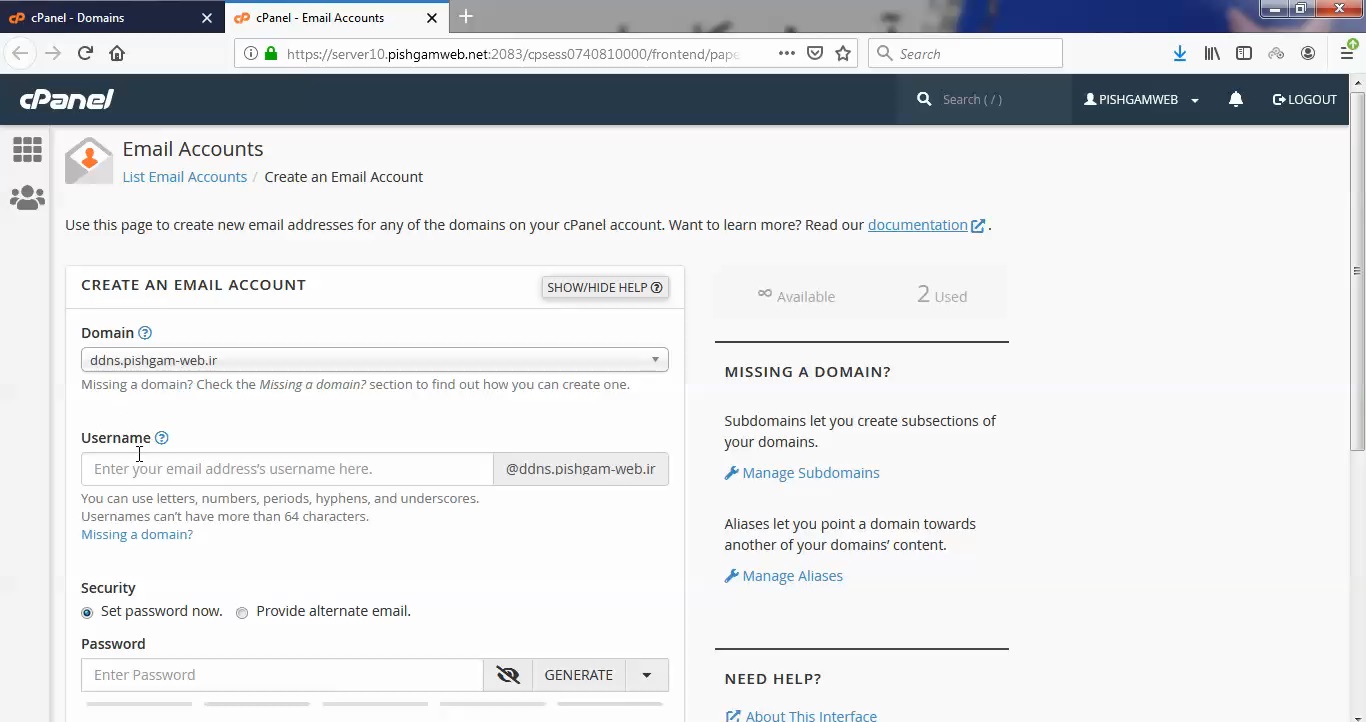
در قسمت Create Email میتوانید برای مین دومین ، پارک دومین ، ادان دومین و ساب دومین ایمیل جدید ایجاد کنید.
در قسمت Manage هم میتوانید پوشه روت دامین مورد نظر را انتخاب کنید و یا دومین مورد نظر را کلا حذف کنید.
اگر قصد تغییر پوشه داشتید حتما پس از تغییر اسم پوشه روی گزینه اپدیت کلیک کنید.
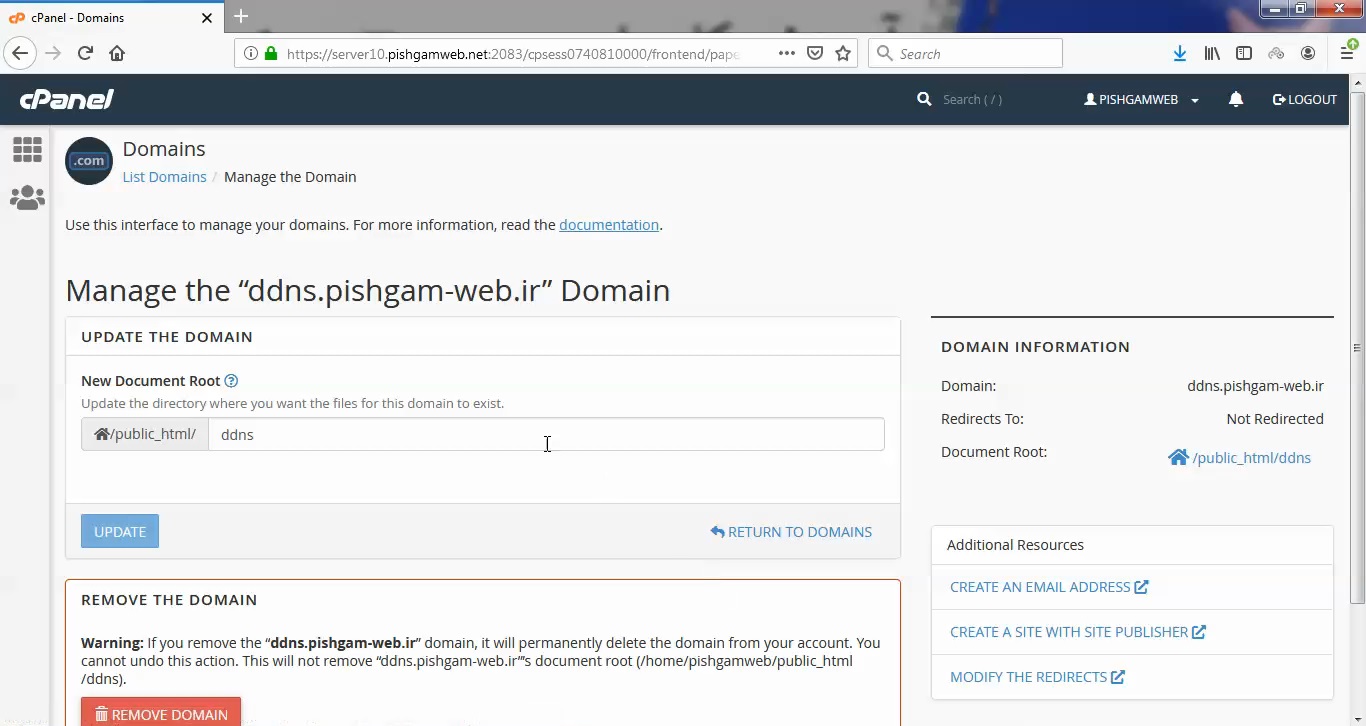
بخش دیگری در قسمت راست وجود دارد بنام Additional Resources که توضیحات این مورد هم پیوست میگردد.
در قسمت Create an Email Address بالاتر هم این مورد توضیح داده شده و ایمیل ایجاد میکنید .
در قسمت Create a site with Site Publisher میتوانید یک دیزایش ساده فعلا برای سایت خود انجام دهید تا اگر نیاز به طراحی حرفه ای تر میباشد در آینده انجام دهید.
در قسمت Modify the Redirects هم میتوانید صفحه مورد نظر را ریداکت کنید لذا اگر روی این قسمت کلیک کنید به قسمت Redirects در سی پنل منتقل میشوید که این قسمت قبلا توسط ما توضیح داده شده است.
مشاهده فیلم آموزشی از سایت آپارات
برای دانلود فیلم آموزش از قسمت تنظیمات روی گزینه دانلود کلیک کرده و کیفیت مد نظر خود را انتخاب کنید تا فیلم آموزش دانلود گردد.
نکته : هر چقدر که عدد این قسمت بیشتر باشد ، کیفیت فیلم دانلودی بالاتر خواهد بود.
آموزش های ابتدایی :
دوستان عزیز آموزش که خدمتتون ارائه کردیم از سری آموزش های ابتدایی پیشگام وب هست و این آموزش جزو پایه ای ترین آموزش های سایت هست امیدوارم که آموزشممون کامل باشه.
learn in cpanel
Overview
Use this interface to create and manage multiple domains from a single cPanel account.
Create a New Domain
To create a new domain, your hosting provider must enable at least one the following features in WHM’s Feature Manager interface (WHM >> Home >> Packages >> Feature Manager):
- Addon Domains
- Aliases
- Subdomains
To create a domain, perform the following steps:
-
Click Create a New Domain. A new interface will appear.
-
Enter a fully qualified domain name in the Domain text box.
-
To create a new domain, enter the new domain name. For example,
example.com. -
To create a subdomain, enter a new name followed by a period (
.) and then the website’s domain. For example, entersubdomain.example.comto create a subdomain ofexample.com. This domain will also appear in cPanel’s Subdomains interface (cPanel >> Home >> Domains >> Subdomains)
-
-
Optionally, you can specify the directory where you want the files for the domain to exist (the domain’s document root). To create this directory, deselect the Share document root with “example.com” checkbox, where
example.comrepresents your main domain.-
Domains that share the document root will also appear in cPanel’s Aliases interface (cPanel >> Home >> Domains >> Aliases).
-
Domains that do not share the document root will also appear in cPanel’s Addon Domains interface (cPanel >> Home >> Domains >> Addon Domains) and the Subdomains interface (cPanel >> Home >> Domains >> Subdomains).
-
-
The interface automatically populates the remaining text boxes, and we recommend that you use these values. However, you can enter different values in the Document Root (File System Location) and Subdomain text boxes if you desire.
-
This setting only appears if your hosting provider enables it.
-
You cannot use the following directories:
-
To automatically redirect the new domain’s visitors from the insecure version of the website to the secure version, set the Force HTTPS Redirect toggle to On.
-
Click Submit or click Submit and Create Another Domain.
List Domains
Some settings only appear if your hosting provider’s settings enable them.
This interface lists your domains.
-
Domain
-
Click Domain to sort the list alphabetically by account name.
-
Click an individual domain to visit the public-facing website.
Note:The Main Domain label identifies the domain that your hosting provider listed to create this account.
-
-
Document Root
-
Click Document Root to sort the list alphabetically by relative directory paths.
-
Click the home icon (
 ) or the file path to navigate to the File Manager interface (cPanel >> Home >> Files >> File Manager) for that domain. A new interface will appear.Note:
This interface displays an unlinked file path if your hosting provider disables the File Manager interface (cPanel >> Home >> Files >> File Manager). For more information, contact your hosting provider.
-
-
Redirects To — If the listed domain redirects to a different domain, the destination will appear here. Click a domain to visit the public-facing website. A new tab will appear.
Note:To manage redirects, navigate to the Redirects interface (cPanel >> Home >> Domains >> Redirects).
-
Force HTTPS Redirect
-
To automatically redirect the new domain’s visitors from the insecure version of the website (HTTP) to the secure version (HTTPS), set the toggle to On.
-
To disable redirection to the secure version of the website, set the toggle to Off.
Important:-
You can only enable redirection on main domains that also possess a valid SSL certificate. If you can’t enable redirection for your domains, contact your hosting provider.
-
The toggle will not appear for aliases.
Note:Select the appropriate checkboxes and then click Force HTTPS Redirect On or Force HTTPS Redirect Off at the top of the table to perform this action on multiple accounts.
-
-
-
Actions
-
Manage — To manage additional settings, click Manage. A new interface will appear.
-
Create Email — To create email addresses for the domain, click Create Email. The Email Accounts interface (cPanel >> Home >> Email >> Email Accounts) will appear.
-
-
Show Associated Subdomains — To show subdomains that the system automatically creates, perform the following steps:
-
Click the gear icon (
). -
Click Show Associated Domains.
Note:This setting is only available if an addon domain exists.
-
 ) or the file path to navigate to the File Manager interface (cPanel >> Home >> Files >> File Manager) for that domain. A new interface will appear.
 ).
).Manage
These settings only appear if your hosting provider enables them.
Use the Manage the Domain interface to manage the domain’s document root directory, remove the domain, or perform other actions. From the Additional Resources menu, you can select the following actions to perform in a new browser tab:
-
Create an Email Address — Add an email address to the website.
-
Create a Site with Site Publisher — Quickly create a simple website, even if you have never created a website before.
-
Modify the Zones — Create, edit, and delete Domain Name System (DNS) records.
-
Modify the Redirects — Send all of the visitors of a domain or particular page to a different URL.
New document root
The domain’s document root directory defines the domain’s directory relative to the cPanel account’s home directory. For example, enter newdomain.com in the New Document Root text box for a cPanel account that uses the /home/username home directory. That domain’s files will reside in the /home/username/public_html/newdomain.com directory.
-
This setting only appears if your hosting provider enables it.
-
This action changes the directory where the server searches for your files. It does not rearrange your files in any way.
-
You cannot modify the document root directory for domains that share that directory with the main domain.
To provide a new document root directory, perform the following steps:
-
Enter a new path, relative to the user’s home directory.
-
Click Update.
Remove the domain
To remove the domain from the cPanel account, perform the following steps:
-
Click Remove Domain.
-
To confirm that you wish to remove this domain, click Yes, remove this domain.
- We strongly recommend that you create a full account backup before you remove a domain. For more information about backups, read our Backup documentation.
- This action only removes the domain’s
vhostentries and DNS entries. The server retains the domain’s directory and contents. - You cannot delete the main domain.
Email accounts when you remove a domain
If you remove a domain that contains email accounts, those email accounts will not appear in the Email Accounts interface (cPanel >> Home >> Email >> Email Accounts). However, the mail folders continue to exist on the server. If you add the domain again, the email accounts will reappear.