 ایمیل
ایمیل  چت آنلاین
  پشتیبانی
 آموزش کار با Track Delivery در cpanel

دوستان عزیز پیشگام وبی امیدوارم که حالتون خوب باشه ، امروز با آموزش کار با Track Delivery در cpanel خدمتتون هستیم و امیدوارم توضیحاتی که در این مطلب و یا در انتها مطلب که بصورت فیلم قرارداده شده بتونه به شما کمک کنه و هر روز بیشتر پیشرفت کنید.
خوب اصلا این قسمت به چه دردی میخوره کجا بهش نیاز داریم و در کل کاربردش چی هست؟
این ابزار سی پنل برای دیدن گزارش های تحویل ایمیل استفاده می شود. همیشه تمام ایمیل ها به دلایل مختلفی به مقصد نمی رسند و باید مسیر ارسال آن ها را ردیابی کرد. به طور خلاصه تفاوتی ندارد که پیام از چه آدرسی ارسال شده بلکه اگر یک سر قضییه صندوق پستی الکترونیکی مربوط به دامنه شما باشد، می توان با ردیابی مسیر ایمیل موفقیت آمیز بودن آن را بررسی کرد. در حالت کلی اگر خطایی مربوط به ایمیل شما رخ دهد از این طریق می توان به ردیابی ایمیلی در هاست سی پنل و رفع مشکلات موجود پرداخت.
Track Delivery در سی پنل ابزاری برای بررسی وضعیت و مسیر ایمیل های دریافتی و ارسال شده می باشد. در چنین حالتی قادر به ردیابی ایمیلی در هاست سی پنل هستیم و مشکلات موجود در قسمت ایمیل را به آسانی شناسایی می نماییم. به زبان ساده به کمک ردیابی ایمیلی می توانید، موارد زیر را بررسی کنید :
- خطاهای ارسال ایمیل
- اسپم های تشخصی داده شده توسط سرویس Apache
- مسیر تحویل ایمیل های ارسالی و دریافتی
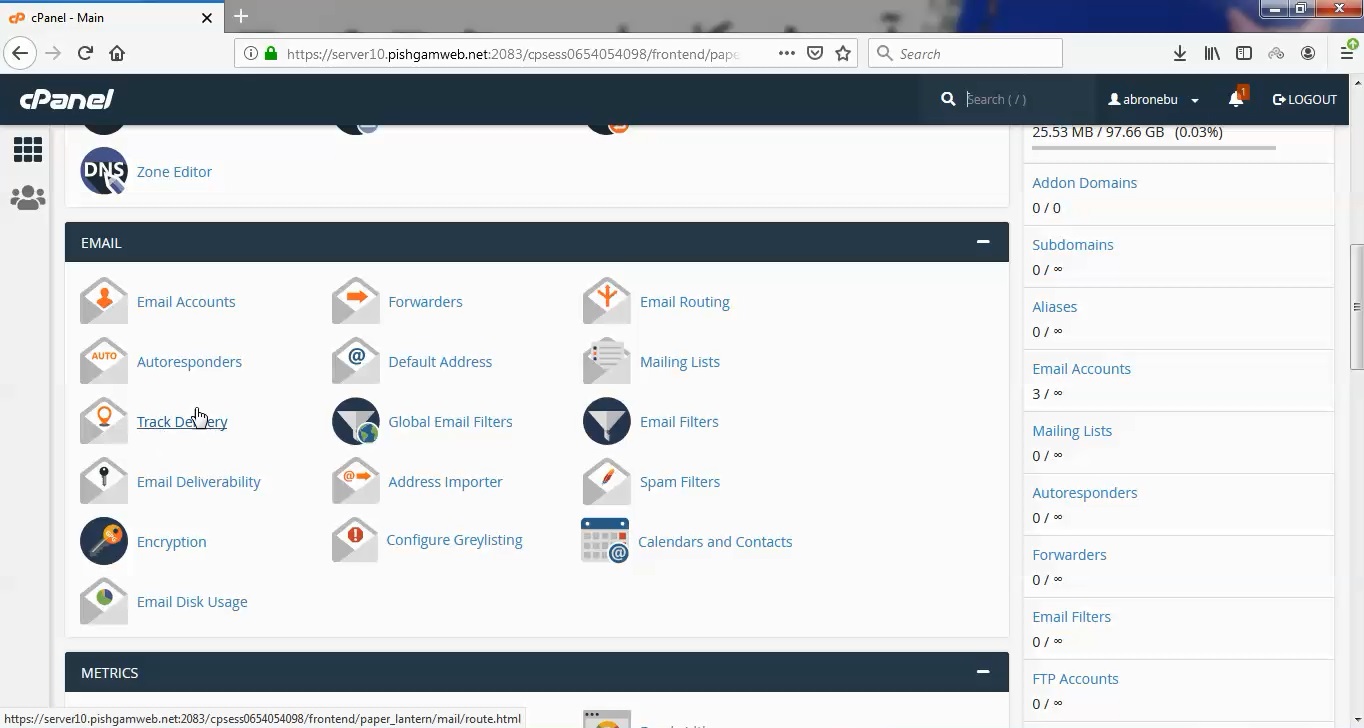
این قسمت برای تغییر پسورد در سی پنل میباشد که با عنوان Track Delivery در قسمت Email موجود میباشد.
ابتدا وارد هاستمون داخل سایت پیشگام وب میشویم.
میتوانید از سایت پیشگام وب قسمت سرویس های من ، سرویس مورد نظر را انتخاب کرده و ورود به سی پنل را بزنید تا بصورت اتوماتیک وارد هاستتون بشید و همچنین میتوانید از لینک سایت خودتون ، البته اگر که دی ان اس های ( DNS ) پیشگام وب را درست ست کرده باشید و 24 ساعت گذشته باشد از طریق پورت 2082 و یا 2083 وارد بشید.
فقط نکته ای که هست و باید بهش توجه کنید ، اگر سایت را با http باز میکنید از پورت 2082 و اگر با https باز میکنید از 2083 استفاده کنید ، نمونه لینک در زیر مشخص شده است.
البته به این نکته توجه داشته باشید که باید جای آدرس سایت ما آدرس سایت خودتان را وارد کنید.
راه آخر جهت لاگین هم در صورتی که دی ان اس ها ( DNS ) را ست نکرده اید یا 24 ساعت از تنظیم آنها نگذشته است و دوست ندارید بطور مثال اطلاعات ناحیه کاربری رو به طراح بدید استفاده از لینک پیشفرض پیشگام وب هست که در زمان خرید هاست برای شما ارسال شده و اگر هم نتونستید پیدا کنید میتوانید تیکت بدهید تا به شما داده شود ، پایین هم میتوانید نمونه لینک رو مشاهده کنید.

از قسمت ایمیل روی گزینه Track Delivery کلیک کنید.
در بعد از گرفتن گزارشات به صورت زیر دسته بندی میشود.
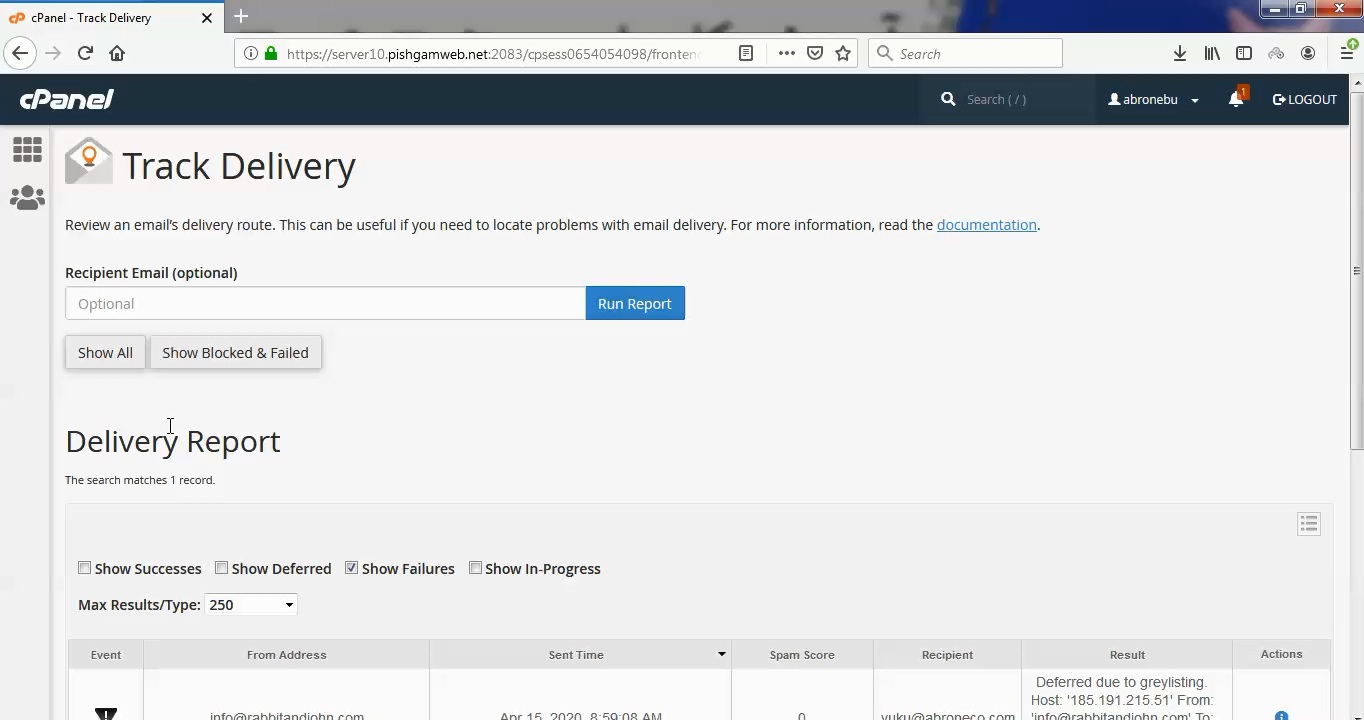
- Show Success: با تیک این گزینه تمام ایمیل های موفقیت آمیز نمایش داده می شود.
- Show Deferred: این فیلتر به شما ایمیل های معوق سیستم را نشان می دهد.
- Show Failures: اگر این گزینه فعال باشد، ایمیل های به مقصد نرسیده را به شما نشان می دهد. همچنین هرگونه خطا هنگام ارسال را خواهید دید.
- Show In-Progress: ایمیل هایی که اکنون در حال انتقال می باشند به شما نمایش داده می شود.
شما می توانید ترکیبی از این فیلترها را تیک بزنید و به آنچه می خواهید دست پیدا کنید.
جدول زیر اطلاعات پیش فرض مربوط به ایمیل ها را نشان می دهد:
- Event: این ستون نمایش دهنده موفقیت و یا عدم موفقیت در ارسال ایمیل و یا ایمیل های معوق است.
- Sender: نمایش دهنده فرستنده ایمیل می باشد.
- Sent time: تاریخ و زمان ارسال ایمیل را نشان می دهد.
- Spam Score: نمره اسپمی که از سوی Apache Spamassassin داده شده را نشان می دهد.
- Recipient: نمایش دهنده ایمیل گیرنده است.
- Result: خطاهای اتفاق افتاده در سیستم را نشان می دهد و نتایج تحویل ایمیل را گزارش می کند.
- Action: با کلیک روی آن می توانید جزئیات گزارش ایمیل ها را مشاهده کنید.
مشاهده فیلم آموزشی از سایت آپارات
برای دانلود فیلم آموزش از قسمت تنظیمات روی گزینه دانلود کلیک کرده و کیفیت مد نظر خود را انتخاب کنید تا فیلم آموزش دانلود گردد.
نکته : هر چقدر که عدد این قسمت بیشتر باشد ، کیفیت فیلم دانلودی بالاتر خواهد بود.
آموزش های ابتدایی :
دوستان عزیز آموزش که خدمتتون ارائه کردیم از سری آموزش های ابتدایی پیشگام وب هست و این آموزش جزو پایه ای ترین آموزش های سایت هست امیدوارم که آموزشممون کامل باشه.
منتظر نظرات و پیشنهادات شما در قسمت دیدگاه های سایت هستیم.
Track Delivery در دایرکت ادمین
متاسفانه این قسمت در دایرکت ادمین وجود ندارد.
Track Delivery from cpanel
This interface displays reports about email message delivery attempts from your account. You can also use this feature to trace a message’s delivery route, which can help you to identify message delivery issues.
Search for the status of an email address’s message delivery attempts
By default, this interface lists the 250 most recent message delivery failures to and from your cPanel account’s mailboxes.
To view the status of message delivery attempts, perform the following steps:
- Enter a recipient email address in the Search text box and click Run Report.
- To display all of the account’s messages, do not enter an address in the Search text box.
- Click Show All to refresh the results in the Delivery Report table and the Email Server Trace diagram.
- To display only the delivery failures, click Show Blocked & Failed.
The Delivery Report table
Warning:
Your hosting provider must enable the Eximstats option in WHM’s Service Manager interface (WHM >> Home >> Service Configuration >> Service Manager) for the Delivery Report table to display messages. The Delivery Report table only displays messages for which the eximstats database stores data.
By default, the table sorts your query’s results into the following columns:
Note:
To add columns to the Delivery Report table, follow the directions in the Column selection section.
Related Documentation
Content by label
There is no content with the specified labels
For Hosting Providers
Content by label
There is no content with the specified labels
| Event | An icon that indicates the message’s delivery status: — The system successfully delivered the message. — The message’s status is unknown, or delivery is in progress. — The system deferred the message. — The message encountered a delivery error. — The system archived the message. For more information, read our Archive documentation. — The system rejected and discarded the message at SMTP time. This typically occurs because the sender’s server does not use a secure configuration or appears on a Real-time Blackhole List (RBL). — The mail server accepted the message but did not deliver the message to the recipient’s inbox. This typically occurs because spam software filtered the message. |
| From Address | The email address on your system that sent the message. |
| Sender | The sender’s cPanel username. |
| Sent Time | The date and time when the user sent the message. |
| Spam Score | The message’s Apache SpamAssassin™ score. |
| Recipient | The email address to which the user sent the message. |
| Result | A message that describes the delivery results. |
| Actions | Click the information icon () to view and print information about the selected message. This information includes information such as a message’s sender, recipient, and username. |
The system retains this data for the amount of days that your hosting provider specifies for the The interval, in days, to retain Exim stats in the database (Minimum: 1; Maximum: 365,000) option in the Stats and Logs section of WHM’s Tweak Settings interface (WHM >> Home >> Server Configurations >> Tweak Settings).
Table Options
Record selection
To filter the records by result, select any of the following checkboxes:
- Show Successes
- Show Deferred
- Show Failures
- Show In-Progress
Select the maximum number of results to display from the Max Results/Type menu.
Column selection
To select the columns that you wish to display or hide in the Delivery Report table, click the table options icon (). A new window will appear.
- To display the column, select the checkbox.
- To hide the column, deselect the checkbox.
From the Table Options window, select or deselect the checkboxes for the following column headers:
| Select All | Selects all available options. |
| Event | An icon that indicates the message’s delivery status. For more information, read the Events section. |
| User | The email address on your system that sent the messageThe sender’s cPanel username. |
| Domain | The sender’s domain. |
| From Address | The email address on your system that sent the message |
| Sender | The sender’s cPanel username. |
| Sent Time | The date and time when the user sent the message. |
| Sender Host | The sender’s host’s IP address. |
| Sender IP Address | The sender’s IP address. |
| Authentication | The sender’s authentication type. |
| Spam Score | The email’s Apache SpamAssassin score. |
| Recipient | The email address to which the user sent the message. |
| Delivery User | The username that owns the recipient’s email address. |
| Delivery Domain | The recipient’s domain. |
| Delivered To | The recipient’s email address. |
| Router | The internal router that the mail server used to determine the message’s destination. |
| Transport | The recipient’s SMTP type. |
| Out Time | The date and time when the intended recipient received the message. |
| ID | The outgoing message’s unique identifier. |
| Delivery Host | The recipient email exchanger’s hostname. |
| Delivery IP Address | The recipient email exchanger’s IP address. |
| Size | The size of the outgoing message. |
| Result | A message that describes the delivery results. |
| Actions | Click the information icon () to view and print information about the selected message. This information includes the message’s sender, recipient, username, and more. |
The Email Server Trace diagram
This diagram displays the sent email’s delivery route from its source to its destination. Under the Legend heading, the following icons appear:
| The mail routing errors that your message encountered. | |
| The filters through which the message passed. | |
| The message’s SMTP destination. | |
| The local mailbox to which the system delivered the message. |
Each icon displays information about the message’s delivery path.