نوشته آموزش کار با Email Filters در cpanel اولین بار در پیشگام وب. پدیدار شد.
]]>
دوستان عزیز پیشگام وبی امیدوارم که حالتون خوب باشه ، امروز با آموزش کار با Email Filters در cpanel خدمتتون هستیم و امیدوارم توضیحاتی که در این مطلب و یا در انتها مطلب که بصورت فیلم قرارداده شده بتونه به شما کمک کنه و هر روز بیشتر پیشرفت کنید.
خوب اصلا این قسمت به چه دردی میخوره کجا بهش نیاز داریم و در کل کاربردش چی هست؟
پرسش بالا یکی از پرتکرارترین سوالاتی بوده که کاربران در قسمت پشتیبانی از ما پرسیده اند! به طور کلی با استفاده از هردو این ابزار می توان به فیلتر کردن ایمیل های دریافتی در هاست سی پنل پرداخت و عملیات خاصی را روی آن ها پیاده نمود. اما تفاوت این دو در عملکرد آن ها روی حساب های ایمیل مربوط به دامنه می باشد، به عنوان مثال برای فیلتر کردن تمام آدرس های ایمیل باید از ابزار Email Filters استفاده نمود. اما اگر اکانت خاصی مدنظر شماست، استفاده از Email Filters را به شما پیشنهاد می دهیم.
این قسمت برای تغییر پسورد در سی پنل میباشد که با عنوان Email Filters در قسمت Email موجود میباشد.
ابتدا وارد هاستمون داخل سایت پیشگام وب میشویم.
میتوانید از سایت پیشگام وب قسمت سرویس های من ، سرویس مورد نظر را انتخاب کرده و ورود به سی پنل را بزنید تا بصورت اتوماتیک وارد هاستتون بشید و همچنین میتوانید از لینک سایت خودتون ، البته اگر که دی ان اس های ( DNS ) پیشگام وب را درست ست کرده باشید و 24 ساعت گذشته باشد از طریق پورت 2082 و یا 2083 وارد بشید.
فقط نکته ای که هست و باید بهش توجه کنید ، اگر سایت را با http باز میکنید از پورت 2082 و اگر با https باز میکنید از 2083 استفاده کنید ، نمونه لینک در زیر مشخص شده است.
البته به این نکته توجه داشته باشید که باید جای آدرس سایت ما آدرس سایت خودتان را وارد کنید.
راه آخر جهت لاگین هم در صورتی که دی ان اس ها ( DNS ) را ست نکرده اید یا 24 ساعت از تنظیم آنها نگذشته است و دوست ندارید بطور مثال اطلاعات ناحیه کاربری رو به طراح بدید استفاده از لینک پیشفرض پیشگام وب هست که در زمان خرید هاست برای شما ارسال شده و اگر هم نتونستید پیدا کنید میتوانید تیکت بدهید تا به شما داده شود ، پایین هم میتوانید نمونه لینک رو مشاهده کنید.

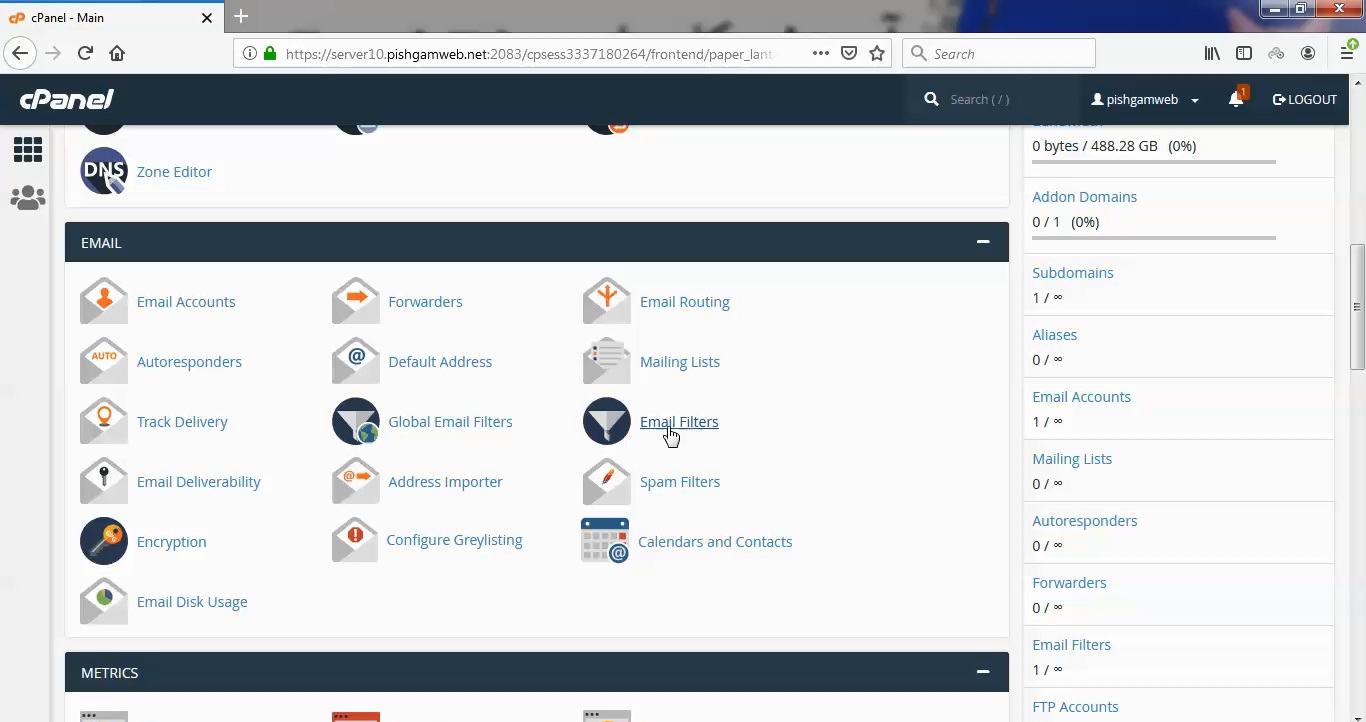
از جعبه ابزار Email بخش Email Filters را انتخاب کنید.
ابتدا ایمیل مورد نظر را انتخاب میکنیم.
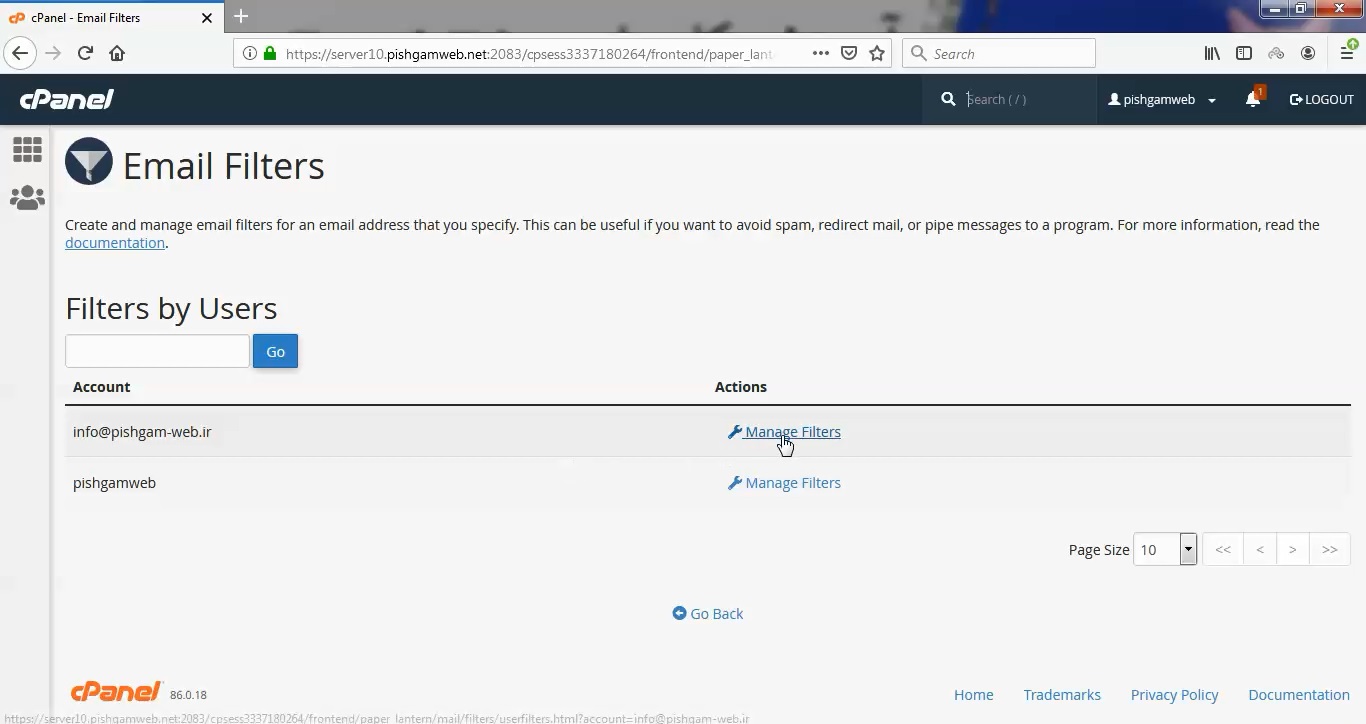
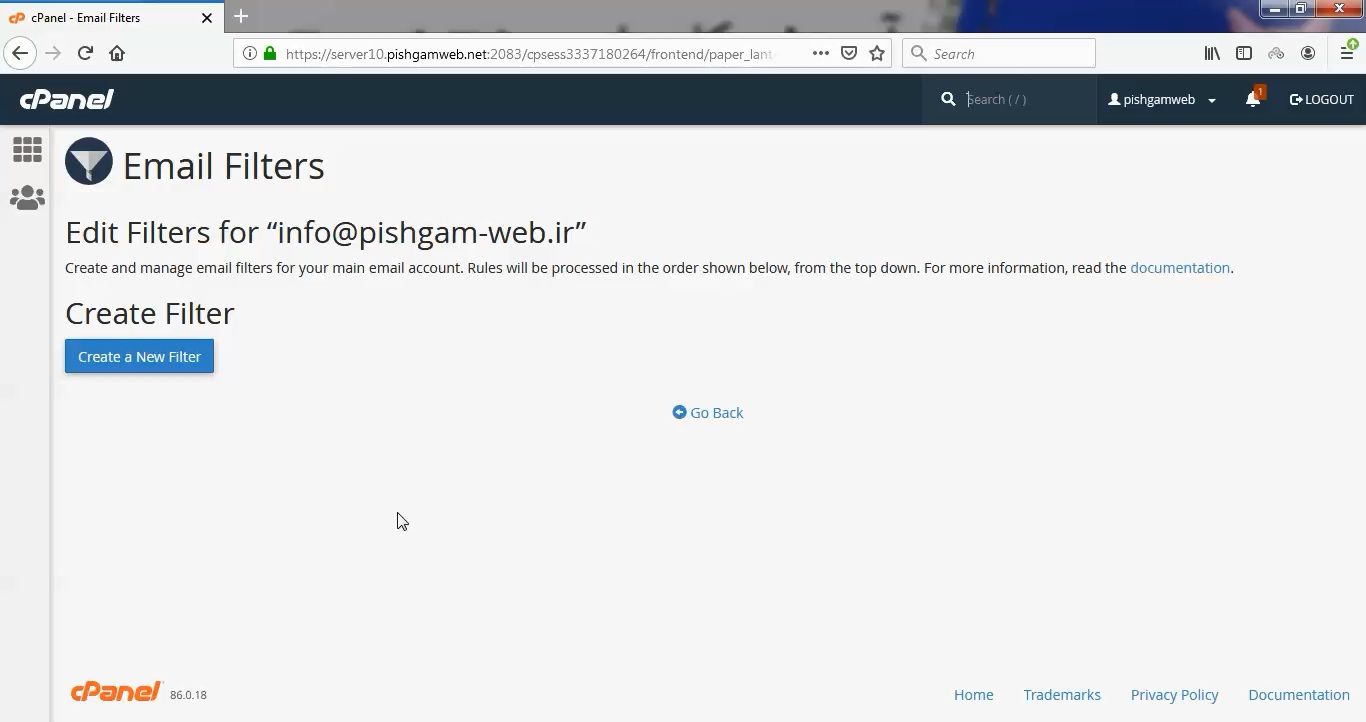
بعد از ورود Create New Filter را کلیک کنید.
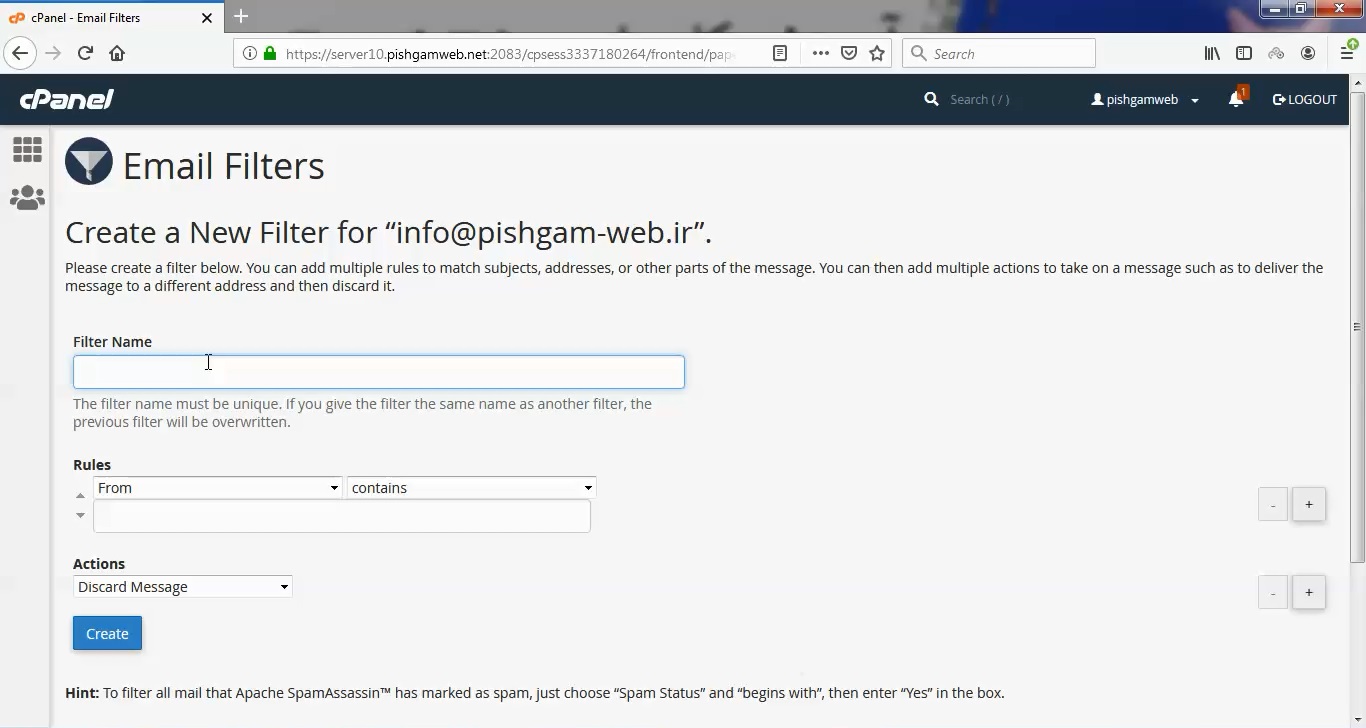
قسمت Filter Name
همانطور که از نام آن پیداست در این قسمت باید نام فیلتر دلخواه خود را وارد نمایید. توجه داشته باشید که نام انتخابی شما باید منحصر به فرد باشد. اگر از نامی استفاده کنید که قبلا فیلتر آن را ایجاد کرده باشید، تنظیمات به روی آن بروزرسانی خواهد شد.
قسمت Rules
این قسمت از دو فیلد و چندین المان مختلف برای ترکیب فیلتر های مختلف تشکیل شده است. به زبان ساده از دو ستون تشکیل شده که در اولی مربوط به تعیین فیلد فیلتر برای اعمال شدن است و در ستون دوم می توان شرایط آن را تنظیم کرد. به طور مثال هنگامی که شما Form را انتخاب می کنید، فیلتر بر اساس آدرس فرستنده ایمیل عمل می کند. همچنین در ستون دوم با انتخاب Contains، اعلام می کنید که اگر آدرس فرستند شامل “عبارت دلخواه شما” باشد، اقدام نماید.
در کادر اول باید قسمتی از ایمیل را انتخاب کنید
From: آدرس ایمیل ارسال کننده
Subject: موضوع ایمیل
To: آدرسی که قرار است به آن ایمیل ارسال کنید.
Reply: آدرسی که پاسخی را برای ارسال کننده آن می فرستید.
Body: متن اصلی ایمیل
Any Header: هر قسمتی از هدر
Any Recipient: هر گیرنده ایمیل
Has Not Been Previously Delivered: Cpanel: بررسی بر روی ایمیل هایی که در صف انتظار برای تحویل هستند.
Is An Error Message: Cpanel: بررسی پیام های اشتباهی که از طرف سیستم خودکار هستند.
List ID: لیست ID
Spam Status: وضعیت اسپم ایمیل توسز آپاچی
Spam Bar: تعیین محتوای هدر Spam Bar توسط آپاچی
Spam Score: مجموع کار علامت + که در Spam Bar قرار دارد.
حالا باید در کادر دوم به تعیین شرط اقدام کنید در واقع کادر اول توسط کادر دوم سفارشی سازی می شود:
Equals: همان تعریف عبارت می شود. (=)
Matches Regex: منطبق بر عبارت Regular که شما تعریف می کنید.
Contain: شامل عبارتی است که شما تعریف می کنید.
Does Not Contain: شامل عبارت تعرفی توسط شما نباشد.
Begin With: با عبارتی که شما تعریف می کنید، آغاز شود.
Ends With: با عبارت خاصی پایان یابد.
Does Not Begin: با عبارت خاصی آغاز نشود.
Does Not End With: با عبارت خاص تمام نشود.
Does Not Match: معادل با عبارت تعریفی نباشد.
Is above: بزرگتر از عدد تعریف شده توسط شما باشد.
Is not Above: عدد تعریفی شما برابر یا کوچکتر باشد.
Is Below: کمتر از عدد تعریفی شما باشد.
Is Not Below: کمتر از عدد تعریفی شما نباشد.
نکته ای که باید به آن توجه کنید این است که تمام عبارت های تعریفی را در کادر سوم وارد کنید.
در کارد مربوط به Action شما باید نوع عملی که می خواهید با فیلتر کردن روی ایمیل ها انجام شود را مشخص کنید.
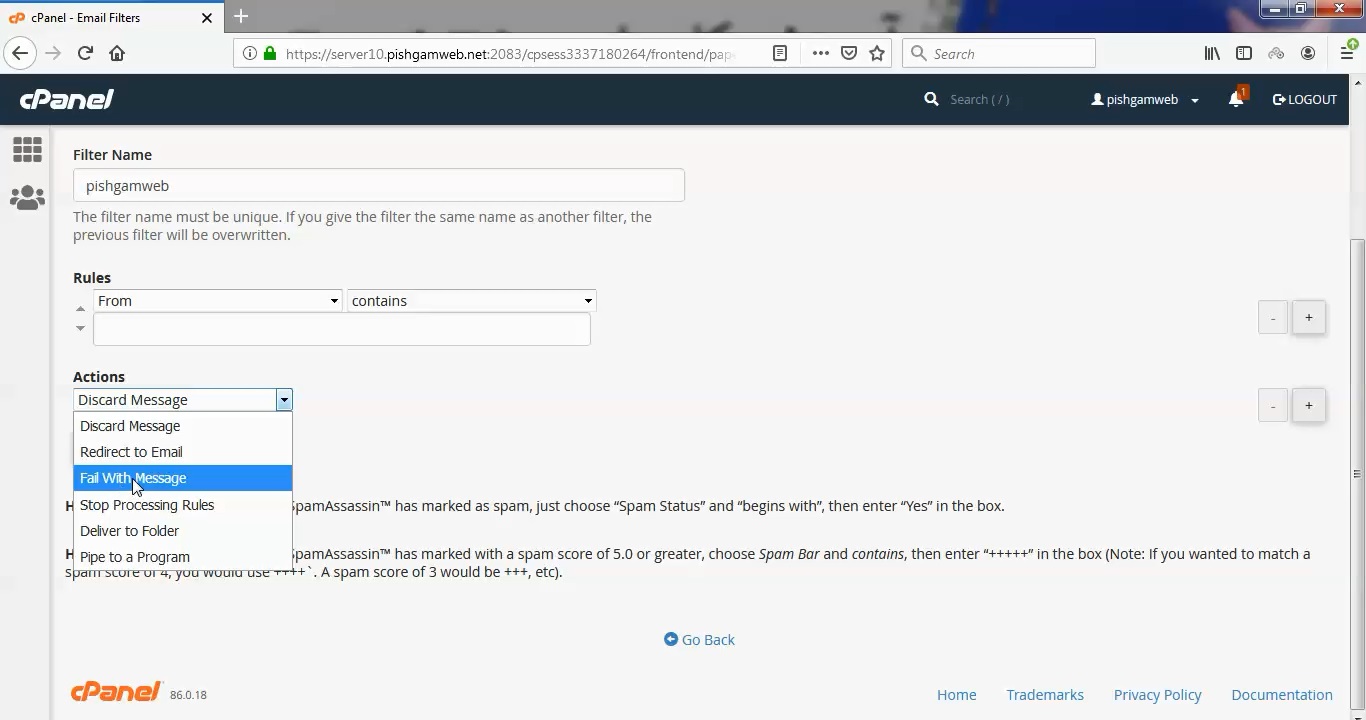
Discard Message: رد کردن ایمیل ها بدون پیام
Redirect to Email: ارسال ایمیل ها را به آدرس ایمیلی که شما تعریف می کنید.
Fail With Message: رد کردن ایمیل ها و ارسال پیام به ارسال کننده ایمیل
Stop Processing Rules: تمامی قوانین را چشم پوشی می کند.
Deliver to Folder: پیام را به پوشه تعریف شده ارسال می کند.
Pipe to Program: پیام های دریافتی را به یک برنامه تعریف شده ارسال میکند.
بعد از تعریف این موارد با کلیک بر روی دکمه Create جهت اعمال تنظیمات اقدام فرمایید.
در پایان چند نکته به محضر شما می رسانیم:
در صورتی که نام فیلتری که وارد کرده اید از قبل موجود باشد فیلتر جدید جایگزین فیلتر قبلی می شود.
بهتر است از قسمت Test Filter جهت اطمینان از درستی فیلتر اقدام کنید.
در قسمت Current Filter فیلتر های از قبل ساخته شده را می توانید مشاهده کنید.
در دستور کار خود به این نکته توجه کنید که استفاده از چند فیلتر کوچک بهتر از فیلتر بزرگ است.
مشاهده فیلم آموزشی از سایت آپارات
برای دانلود فیلم آموزش از قسمت تنظیمات روی گزینه دانلود کلیک کرده و کیفیت مد نظر خود را انتخاب کنید تا فیلم آموزش دانلود گردد.
نکته : هر چقدر که عدد این قسمت بیشتر باشد ، کیفیت فیلم دانلودی بالاتر خواهد بود.
آموزش های حرفه ای :
دوستان عزیز به انتهای این آموزش رسیدیم و این آموزش که خدمتتون هست از سری آموزش های حرفه ای پیشگام وب هست و یواش یواش اگر آموزش ها رو کامل فرا گرفته باشید میتوانید خودتون رو یک طراح سایت بدونید و ما از این بابت خیلی خوشحال هستیم و امیدواریم همیشه شاد و سر زنده باشید.
Email Filters در دایرکت ادمین
متاسفانه این امکان در دایرکت ادمین فعال نمیباشد.
learn from cpanel
Email filters use the criteria that you specify to determine how to handle email messages. The following cPanel interfaces allow you to configure email filters:
- The Global Email Filters interface (cPanel >> Home >> Email >> Global Email Filters) — Global email filters affect the cPanel account’s email addresses.
- The Email Filters interface (cPanel >> Home >> Email >> Email Filters) — User-level filters affect specific email addresses on the cPanel account.
Note:
In these interfaces, click + to add a rule, or click - to remove rules.
Filter rules and criteria
The first set of options specifies which part of the email message the system examines to determine whether the message matches your filter parameters.
You can choose from the following options:
| From | The message sender’s address. |
| Subject | The message’s subject line. |
| To | The address to which the sender sent the message.Note: Generally, the recipient does not receive the BCC field in an email’s header. For this reason, you cannot use the BCC field in a filter. |
| Reply Address | The address at which the sender receives replies. |
| Body | The message’s content. |
| Any Header | Any part of the message’s header. |
| Any recipient | Any recipient of the message. |
| Has not been previously delivered | The system only examines messages that remain in the queue for delivery. |
| is an Error Message | The system only examines error messages that an auto-response system sends. |
| List ID | The account’s mailing lists. |
| Spam Status | Whether Apache SpamAssassin marked the message as spam. The Spam Status line begins with marked the message as spam. The Spam Status line begins with Yes or No. |
| Spam Bar | The content of the Spam Bar header that Apache SpamAssassin generated for this message. The more plus signs (+) that Apache SpamAssassin assigns to a message, the greater the likelihood that the system marks the message as spam. |
| Spam Score | The total number of plus signs (+) in the Spam Bar value, expressed as an integer.For more information about the Spam Score option, read the Spam Score section below. |
Operators
After you select the portion of the email message that the system will examine, select the type of comparison between that portion of the email and the criteria that you enter.
You can choose from the following options:
| equals | The message exactly matches a defined string. |
| matches regex | The message matches a regular expression that you define.Note The filter text box accepts regular expressions when you select this option, rather than commonly-used wildcard characters (for example, * or ?). |
| contains | The message a string that you define. |
| does not contain | The message does not contain the defined string. |
| begins with | The message begins with the defined string. |
| ends with | The message ends with the defined string. |
| does not begin | The message does not begin with the defined string. |
| does not end with | The message does not end with the defined string. |
| does not match | The message does not exactly match the defined string. |
Spam Score
The following options are only applicable when you select the Spam Score option:
| is above (#s only) | The message’s Spam Score is greater than the number that you define. |
| is not above (#s only) | The message’s Spam Score is equal to or less than the number that you define. |
| is below (#s only) | The message’s Spam Score is less than the number that you define. |
| is not below (#s only) | The message’s Spam Score is greater than or equal to the number that you define. |
Important
When you create a filter that uses several operators, the system processes the and operator before the or operator. For example:
- The system processes
A or B and CasA or (B and C). - The system processes
A and B or Cas(A and B) or C.
Criteria
Enter the criteria to use in the text box under the Rules menus. The type of data that you enter determines the comparison that the system performs.
For example, if you select the From and Equals filters, enter [email protected] as the criteria. The system determines that any email from [email protected] matches the filter, but does not match [email protected] because it contains additional letters.
Important
Exim converts newlines into spaces in the $message_body field. Do not add \n characters to any body filters that you create.
Actions
When cPanel determines that an email message matches your filter, it handles that message with the any of the following actions that you specify:
| Discard Message | The system discards the incoming message with no failure notice. |
| Redirect to email | The system forwards the message to another email address that you specify. |
| Fail with message | The system discards the message and automatically send a failure notice to the sender. |
| Stop Processing Rules | The system skips all filter rules. |
| Deliver to folder | The system delivers the message to a specified folder. |
| Pipe to a program | The system sends the incoming message to a specified program. For more information, read the Pipe to a Program section below. |
Pipe to a Program
Important:
Make certain that your script uses the proper file permissions (0700). To change your script’s file permissions, run the chmod 0700 myscript.php command, where myscript.php represents your script’s location and file name.
Use the Pipe to a Program option to parse and enter email information into a different system. For example, use the Pipe to a Program option to pipe email information to a program that enters email information into a ticket system.
STDINpipes email and headers to the program.- Pipes can accept variables from the
$_SERVERarray and variables on the command line. - The language or environment that you use may cause memory limit issues.
- If your script produces any output, even a blank line, the system will create a bounce message that contains that output.
When you use the Pipe to a Program option, enter a path that is relative to your home directory. For example, to use the
/home/user/
script.pl script, enter
script.pl
in the Pipe to a Program text box, where user represents your username.
Note:
If you use PHP, make certain that you appropriately wrap your code in start and end tags.
نوشته آموزش کار با Email Filters در cpanel اولین بار در پیشگام وب. پدیدار شد.
]]>